Uploading and downloading files through a Laravel API is a fundamental yet powerful feature for various applications. With some custom coding Laravel can easily support this feature, allowing you to upload images, PDF or any other files you wish.
In this guide, we’ll walk through the steps to create a Laravel API that supports uploading, downloading and listing previously uploaded files. During the upload process we will store some basic file information in a table and show this information in the index response.
Let’s get started!
Step 1: Set Up Laravel Project
Begin by creating a new Laravel project using Composer:
composer create-project --prefer-dist laravel/laravel file-apiStep 2: Configure Database
For simplicity I recommend using an SQLite Database on your local computer. If you’ve installed Laravel 11 or newer it will use SQLite out of the box. Otherwise you can use it by simply editing the .env file in your Laravel root folder to:
DB_CONNECTION=sqlite
# DB_HOST=127.0.0.1
# DB_PORT=3306
# DB_DATABASE=laravel
# DB_USERNAME=root
# DB_PASSWORD=
Step 3: Create Migration
Run the following Artisan command to generate a “File” model and a migration file:
php artisan make:model File -mStep 4: Add Migration Code
Add the following code to the generated migration file to define the table’s columns in the up() method and what happens when rolling back the migration in the down() method
<?php

use Illuminate\Database\Migrations\Migration;
use Illuminate\Database\Schema\Blueprint;
use Illuminate\Support\Facades\Schema;

return new class extends Migration
{
    public function up(): void
    {
        Schema::create('files', function (Blueprint $table) {
            $table->id();
            $table->string('original_name');
            $table->string('generated_name');
            $table->timestamps();
        });
    }

    public function down(): void
    {
        Schema::dropIfExists('files');
    }
};
Step 5: Run Migrations
Now we can actually create the table “files” in our database by running:
php artisan migrateStep 6: Add Model Code
Open the generated Model File.php and add a $fillable property to allow easy mass assignment of it’s values when we’ll be creating the record later:
<?php

namespace App\Models;

use Illuminate\Database\Eloquent\Model;

class File extends Model
{
    protected $fillable = [
        'original_name',
        'generated_name',
    ];
}
Step 7: Create Controller
Generate a FileController class by running the following Artisan command:
php artisan make:controller FileControllerStep 8: Add Controller code
Open the generated FileController.php file and add the following methods to upload, download or show an index with all previously uploaded files:
<?php

namespace App\Http\Controllers;

use App\Models\File;
use Illuminate\Http\JsonResponse;
use Illuminate\Http\Request;
use Illuminate\Support\Str;

class FileController extends Controller
{
    // Receives a file upload
    public function upload(Request $request): JsonResponse
    {
        $file = $request->file('file');
        $fileName = Str::random(20) . '.' . $file->getClientOriginalExtension();
        $file->storeAs('uploads', $fileName);

        File::create([
            'original_name' => $file->getClientOriginalName(),
            'generated_name' => $fileName,
        ]);

        return response()->json(['message' => 'File uploaded successfully']);
    }

    // Returns a list of previously uploaded files
    public function index(): JsonResponse
    {
        $files = File::all();
        return response()->json($files);
    }

    // Sends the requested file as a download, if found
    public function download(File $file)
    {
        $filePath = storage_path("app/uploads/{$file->generated_name}");

        if (file_exists($filePath)) {
            return response()->download($filePath, $file->original_name);
        } else {
            abort(404, 'File not found');
        }
    }

}
Step 9: Configure Routes
Define routes to handle upload, download and index requests in routes/api.php:
<?php

use Illuminate\Support\Facades\Route;
use App\Http\Controllers\FileController;

Route::get('/files', [FileController::class, 'index'])->name('files.index');
Route::post('/files/upload', [FileController::class, 'upload'])->name('files.upload');
Route::get('/files/{file}/download', [FileController::class, 'download'])->name('files.download');
These routes define the 3 endpoints our API provides for the outside world to use.
Let’s find out how to run and test our application in the next steps!
Step 10: Run the Application
Use the following artisan command to start the application:
php artisan serveNow you can use our upload, download and show the index of files using a client of your choice by calling the endpoints accordingly:
- http://127.0.0.1:8000/api/files (via GET)
- http://127.0.0.1:8000/api/files/upload (via POST)
- http://127.0.0.1:8000/api/files/download (via GET)
This can be done by, for instance, another Laravel application or a tool like Postman. Personally I often use Postman to quickly verify an API works as expected.
In the next step I will show you how to setup Postman in order to test our example application.
Step 11: Test the API With Postman (Optional)
Now you can download Postman and use it to verify our API properly uploads, downloads and shows the index of files.
If you don’t want to add the API requests to Postman manually you can download the collection here, unzip it and import it into Postman.
Let’s have a look at each of the requests involved.
- Making the “Upload” Request in Postman
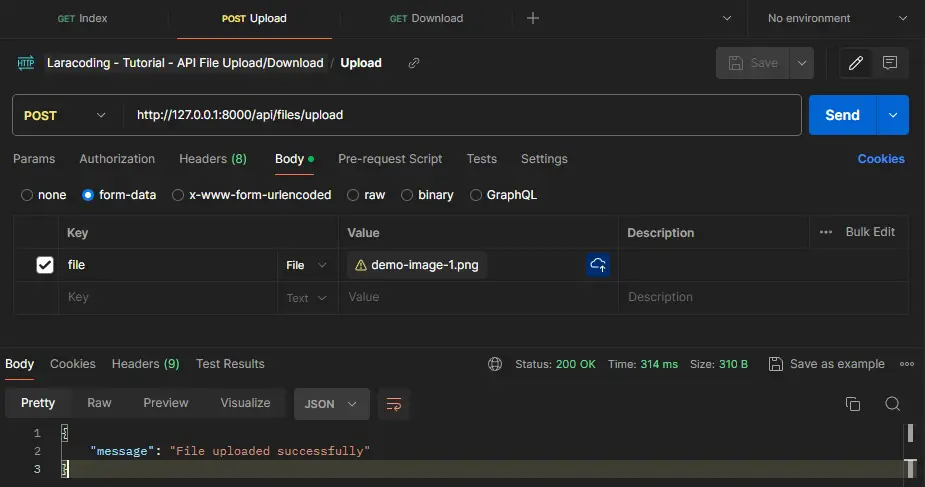
Create a new request to http://127.0.0.1:8000/api/files/upload. Note that for this request the little dropdown next to the URL must be set to “POST”. In the “Body” tab switch to “form-data” and add a key with the name “file”, the little dropdown next to it must be changed from “File” to “Text”.
To upload a file use the “Value” column in the form-data. It opens a filepicker to select a file from your local disk. Now if you clock “Send” it will upload the file output a message, in the response “Body” in JSON format, saying “File uploaded successfully”:
- Making the “Index” Request in Postman
Create a new request to http://127.0.0.1:8000/api/files. Note that for this request the little dropdown next to the URL must be set to “GET”. In the “Body” tab keep everything empty. Now if you click “Send” you should receive a list of all previously uploaded files, in the response “Body” in JSON format:

- Making the “Download” Request in Postman
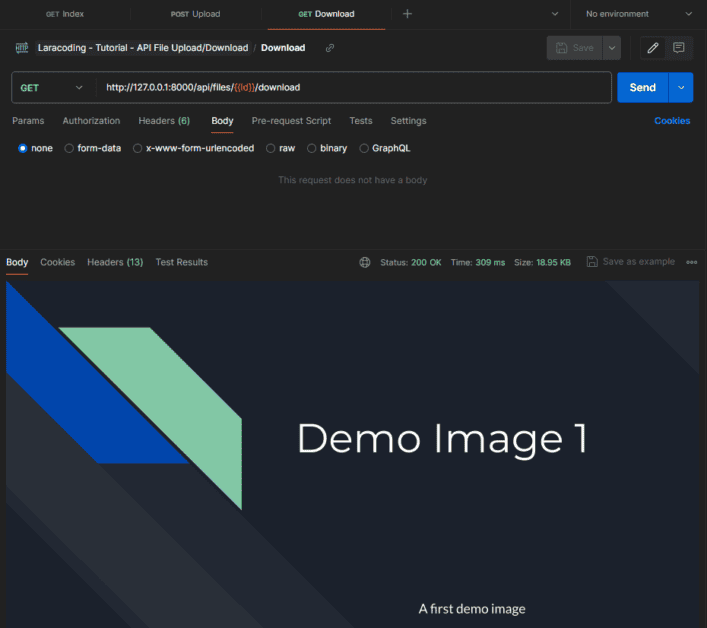
Create a new request to http://127.0.0.1:8000/api/files/{{id}}/download. Note that for this request the little dropdown next to the URL must be set to “GET”. In the “Body” tab keep everything empty.
Note the the {{id}} part is a variable. You can edit this value by editing the collection “variables” . If you prefer, you can also use a hardcoded id you know exists in your files table, for example: http://127.0.0.1:8000/api/files/1/download
Now if you click “Send” you should download the uploaded file or image and it will display it in the response “Body” part:
! Important Caveat ! : Add “Accept” Header “application/json”
For each request you should add header line with key “Accept” and a value of “application/json”:
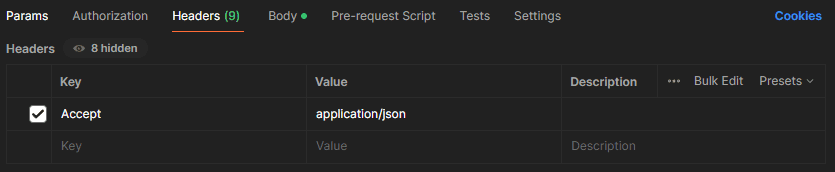
If you don’t add this Laravel will unexpectedly return a web 404 page instead of a proper API response with a list of error messages in JSON format.
Frequently Asked Questions
How can the API validate the upload request?
A production API should validate the upload request did actually send a file and that it is of the expected type and size.
// Namespaces and imports ..
class FileController extends Controller {
public function upload(Request $request): JsonResponse
{
// Validate the incoming request
$request->validate([
// Accept only jpg,png images or a PDF with a maximum of 32 megabytes
'file' => 'required|file|mimes:jpeg,png,pdf|max:32768',
]);
$file = $request->file('file');
// Generate a unique file name
$fileName = Str::random(20) . '.' . $file->getClientOriginalExtension();
// Store the file in the 'uploads' directory
$file->storeAs('uploads', $fileName);
// Create a record in the database for the uploaded file
File::create([
'original_name' => $file->getClientOriginalName(),
'generated_name' => $fileName,
]);
// Return a success response
return response()->json(['message' => 'File uploaded successfully']);
}
// Rest of FileController class ..
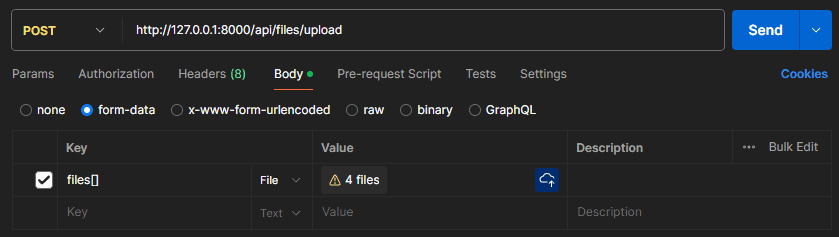
}How Can the API Upload Accept Multiple Files at Once?
In Postman (or any other client instead of sending your file form-data with key “file” change the key to “file[]” and alter the upload method to use a foreach loop.
The code would then look like:
// Namespaces and imports ..

class FileController extends Controller {

    public function upload(Request $request): JsonResponse
    {
        if ($request->hasFile('files')) {
            foreach ($request->file('files') as $file) {
                $fileName = Str::random(20) . '.' . $file->getClientOriginalExtension();
                $file->storeAs('uploads', $fileName);
                $uploadedFile = File::create([
                    'original_name' => $file->getClientOriginalName(),
                    'generated_name' => $fileName,
                ]);
                $uploadedFiles[] = $uploadedFile;
            }
        }

        return response()->json(['message' => 'Files uploaded successfully', 'files' => $uploadedFiles]);
    }

    // Rest of FileController class ..
}
In Postman you can then send, for example 4 files, like this:
How Can I Add Authentication to my Laravel API?
In most cases you can and should add authentication when running an API in production. Laravel provides several authentication methods out of the box, including token-based authentication using Laravel Passport or session-based authentication using Laravel Sanctum. Either of these 2 are a great fit for securing your file upload API.
Conclusion
In this tutorial we’ve built endpoints to upload, download and list previously uploaded files. Additionally, we’ve addressed common questions regarding supporting multiple file uploads, validating incoming uploads, and adding authentication to an API.
I’m hoping this is useful when building your own Laravel APIs. If you’d like to ask a question or share what you’ve used these techniques for, feel free to let me know in the comments below!
Happy coding!
References
- Routing – API Routes (Laravel Documentation)
- Validation – Writing Validation Logic (Laravel Documentation)
- Validation – Available Validation Rules (Laravel Documentation)
- Using Variables in Postman (Postman Documentation)
This entry is part 2 of 2 in the series Building and consuming APIs
- How to Call an External API Using Laravel (Tutorial)
- How to Upload and Download Files Using a Laravel API
