In Laravel, sorting data based on the count of related records is a common and technique, often used to create sorted overviews of data in real-world applications. Laravel Eloquent supports an elegant syntax to sort by the count of related records:
$posts = Post::withCount('comments')
->orderBy('comments_count', 'desc')
->get();
This blog post will describe how to build an application that uses this technique to order posts by their number of comments. We’ll cover all the necessary steps, including creating the required models and their relationships, populating the tables with test data, and making a simple page that prints a list of posts sorted by their comment counts.
Let’s get started!
Step 1: Create a Laravel Project
Begin by creating a new Laravel project if you haven’t done so already. Open your terminal and run:
composer create-project laravel/laravel order-by-relationship
cd order-by-relationship
Step 2: Create Migration and Model
Run the following artisan commands to generate the migration and model files:
php artisan make:migration create_posts_table --create=posts
php artisan make:model Post

php artisan make:migration create_comments_table --create=comments
php artisan make:model Comment
Step 3: Add Migration Code
Open the generated migration file (e.g., create_posts_table) and define the columns. Ensure there is a foreign key for comments relationship.
For the posts migration use:
<?php

use Illuminate\Database\Migrations\Migration;
use Illuminate\Database\Schema\Blueprint;
use Illuminate\Support\Facades\Schema;

return new class extends Migration
{
    public function up(): void
    {
        Schema::create('posts', function (Blueprint $table) {
            $table->id();
            $table->string('title');
            $table->string('excerpt')->nullable();
            $table->text('body');
            // Add other post fields as needed
            $table->timestamps();
        });
    }

    public function down(): void
    {
        Schema::dropIfExists('posts');
    }
};
For the comments migration use:
<?php

use Illuminate\Database\Migrations\Migration;
use Illuminate\Database\Schema\Blueprint;
use Illuminate\Support\Facades\Schema;

return new class extends Migration
{
    /**
     * Run the migrations.
     */
    public function up(): void
    {
        Schema::create('comments', function (Blueprint $table) {
            $table->id();
            $table->unsignedBigInteger('post_id');
            $table->text('content');
            $table->timestamps();

            // Foreign key relationship
            $table->foreign('post_id')->references('id')->on('posts')->onDelete('cascade');
        });
    }

    /**
     * Reverse the migrations.
     */
    public function down(): void
    {
        Schema::dropIfExists('comments');
    }
};
Step 4: Run the Migrations
Create the table by running the following Artisan command:
php artisan migrateStep 5: Define Models and Relationships
In the Post model, define the relationship with comments:
<?php

namespace App\Models;

use Illuminate\Database\Eloquent\Model;

class Post extends Model
{
    protected $fillable = [
        'title',
        'excerpt',
        'body',
    ];

    public function comments()
    {
        return $this->hasMany(Comment::class);
    }
}
For the Comments model use:
<?php

namespace App\Models;

use Illuminate\Database\Eloquent\Model;

class Comment extends Model
{
    protected $fillable = [
        'post_id',
        'content',
    ];

    // Define the relationship with the Post model
    public function post()
    {
        return $this->belongsTo(Post::class);
    }
}
Step 6: Add Testdata
- Create a Seeder:
Run the following Artisan command to generate a seeder:
php artisan make:seeder PostSeeder- Add Seeder code
Open the generated seeder file (PostSeeder.php) and update the run method with the following code:
<?php

namespace Database\Seeders;

use App\Models\Post;
use Illuminate\Database\Seeder;

class PostSeeder extends Seeder
{
    public function run()
    {
        // Create 6 posts
        $posts = [];
        for ($postNumber = 1; $postNumber <= 6; $postNumber++) {
            $post = Post::create([
                'title' => "Post $postNumber",
                'body' => "This is the content of Post $postNumber."
            ]);

            // Attach comments to specific posts
            $commentsCount = rand(1, 5); // Adjust the range as needed
            for ($commentNumber = 1; $commentNumber <= $commentsCount; $commentNumber++) {
                $post->comments()->create([
                    'content' => "Comment $commentNumber on Post $postNumber."
                ]);
            }

            $posts[] = $post;
        }
    }
}- Run the Seeder:
After updating the seeder file, run the following Artisan command to execute the seeder:
php artisan db:seed --class=PostSeederYou should now have plenty of testdata as shown in the screenshot below:
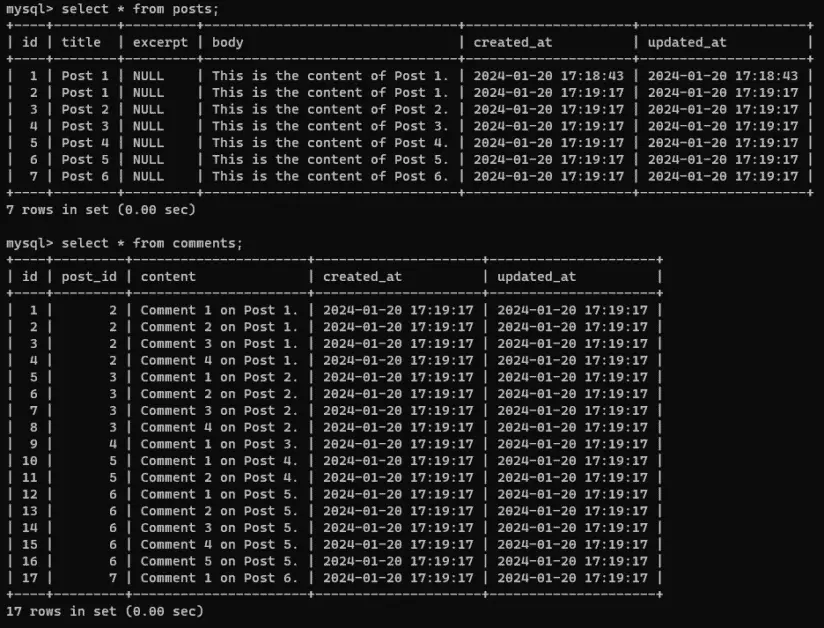
PostSeederNote that we used a simple seeder without factories to keep this tutorial simple. For more complex scenarios, I recommend checking out Seeding a Model With Relationship Using Laravel Factories. This method allows for a much more flexible definition of data for records and related data, specifically useful for automated testing.
Step 7: Fetching Ordered Results
Now, when querying posts, you can order them by the count of comments. For testing purposes we add a simple route to our web.php:
use App\Models\Post;
use Illuminate\Support\Facades\Route;

Route::get('/test', function () {
    $posts = Post::withCount('comments')
        ->orderBy('comments_count', 'desc')
        ->get();

    foreach ($posts as $post) {
        dump("Post with title `$post->title` has $post->comments_count comments");
    }
});
Step 8: Run the application
Run the following command to run the application:
php artisan serveNow to your browser and open:
http://127.0.0.1:8000/test
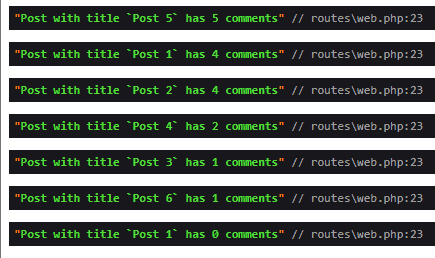
You’ll see the posts ordered by their comment count, starting with the highest number:
Conclusion
Ordering by relationship count in Laravel is a powerful feature that helps with creating useful overviews for your application. By following the steps in this post, you can easily implement this functionality in your real-world projects.
As an extra exercise, consider formatting the list of posts as a table and adding a feature to toggle sorting from the lowest to the highest count and vice versa. Let me know how it went in the comments. Happy coding!
References:
- Eloquent Relationships (Laravel Documentation)
- Database Migrations (Laravel Documentation)