Are you wondering how to add jQuery to your Laravel application? Well, you’re not alone. Many Laravel developers face this challenge, especially beginners.
In this blog post, we will discuss four easy methods to add jQuery to Laravel, including from a CDN URL, direct inclusion from the public folder, using Vite, and using Laravel Mix.
Let’s get started!
Method 1: Loading jQuery from a CDN URL
Using a CDN (Content Delivery Network) URL can offer several advantages, including faster load times and cached files. Here’s how to use a CDN URL for jQuery in your Laravel application:
- Choose a reliable CDN provider that hosts the jQuery library like Google or Microsoft.
- Choose a version and copy its URL to a
scripttag in your view file for example:
<script src="https://ajax.googleapis.com/ajax/libs/jquery/3.7.1/jquery.min.js"></script>To test that jQuery works we’ll make simple animated boxes that appear on clicking a button:

The code to make this example in Laravel blade:
<!DOCTYPE html>
<html lang="{{ str_replace('_', '-', app()->getLocale()) }}">
<head>
    <meta charset="utf-8">
    <meta name="viewport" content="width=device-width, initial-scale=1">
    <title>Laracoding.com - jQuery boxes example</title>
    <link rel="stylesheet" href="https://cdnjs.cloudflare.com/ajax/libs/bulma/0.9.3/css/bulma.min.css">
    <script src="https://ajax.googleapis.com/ajax/libs/jquery/3.7.1/jquery.min.js"></script>
</head>
<body>
    <section class="section">
        <div class="container">
            <div class="columns">
                <div class="column">
                    <h1 class="title">jQuery boxes demo</h1>
                    <div class="field">
                        <label class="label">Click to fade in boxes</label>
                        <div class="control">
                            <button class="button is-link">Click me</button>
                        </div>
                    </div>
                    <div class="field">
                        <div id="div1" class="mr-5 is-pulled-left" style="width:80px;height:80px;display:none;background-color:red;"></div>
                        <div id="div2" class="mr-5 is-pulled-left" style="width:80px;height:80px;display:none;background-color:green;"></div>
                        <div id="div3" class="mr-5 is-pulled-left" style="width:80px;height:80px;display:none;background-color:blue;"></div>
                    </div>
                </div>
            </div>
        </div>
    </section>
    <script>
        $(document).ready(function(){
            $("button").click(function(){
                $("#div1").fadeIn();
                $("#div2").fadeIn("slow");
                $("#div3").fadeIn(3000);
            });
        });
    </script>
</body>
</html>
Method 2: Including jQuery directly from the Public Folder
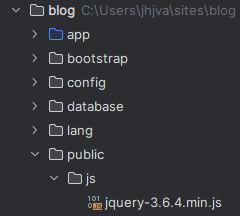
/public FolderThis method can be used if you wish to host the jQuery file(s) on your own website.
To include jQuery directly from the public folder, follow these simple steps:
- Download jQuery from their official website
- Save your JS file, for example
jquery-3.7.1.min.js, in yourpublicfolder - Include the jQuery file in your view file by adding the following line of code to the head section:
<script src="{{ asset('jquery-3.7.1.min.js') }}"></script>Method 3: Loading jQuery using Vite (Laravel 9,10)
Vite is a build tool for modern web development that can be used in Laravel applications. It is a command-line tool that is designed to be simple and fast, allowing developers to quickly and easily build CSS and JavaScript assets based on files in the resources folder.
To include jQuery in your Laravel project using Vite, follow these steps:
- Install jQuery via npm:
npm install jquery --save-devThis command will use npm to download the most current jQuery library and save it into your node_modules folder. It will also update package.json to reflect this.
- Import jQuery by adding the following line to
resources/js/app.js:
import jQuery from 'jquery';
window.$ = jQuery;
This will make the jQuery available in all modules by the global variable “$”
- Run Vite using the following command:
npm run build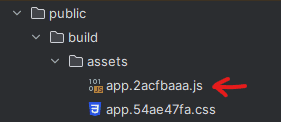
/public FolderThis will generate a compiled JavaScript file in the public/build/assets directory. It will automatically add a version to the filename too. This is useful since it will prevent the browser from using an older cached file.
- In your blade template add:
@vite(['resources/js/app.js'])This Laravel directive is smart enough to find the correct file in the public/build/assets folder and include it in your HTML (it will even add the correct version string to it).
- You can now use jQuery in your blade by using this blade code:
<!DOCTYPE html>
<html lang="{{ str_replace('_', '-', app()->getLocale()) }}">
<head>
    <meta charset="utf-8">
    <meta name="viewport" content="width=device-width, initial-scale=1">
    <title>Laracoding.com - Including jQuery with Vite</title>
    @vite(['resources/css/app.css', 'resources/js/app.js'])
</head>
<body>
    <p class="zoomable">
        Click me to zoom
    </p>
    <script type="module">
        $(document).ready(function(){
            $(".zoomable").click(function(){
                $(this).animate({
                    fontSize: "40px"
                }, 1000);
            });
        });
    </script>
</body>
</html>
Note that the script tag has a type="module" in it. If you don’t add that jQuery won’t work and you will see an error in the browser’s JavaScript console like “Uncaught ReferenceError: $ is not defined”
Method 4: Loading jQuery using Laravel Mix (Laravel 5,6,7,8)
The fourth and final method for including jQuery in your Laravel project is to use Laravel Mix. Laravel Mix is an elegant wrapper around Webpack that makes it easy to use Webpack to process and compile your assets. It comes with several built-in features such as minification, concatenation, versioning, and more.
To include jQuery in your Laravel project using Laravel Mix, follow these steps:
- Install jQuery via npm:
npm install jquery --save-dev- Create or open
webpack.mix.jsin the root folder of your Laravel project, and paste this code:
const mix = require('laravel-mix');

mix.js('resources/js/app.js', 'public/js')
    .css('resources/css/app.css', 'public/css', [
        //
]).version();- Run the following command to compile the assets:
npm run prodThis command will compile your JS and CSS, minify them and place them in the public directory of your Laravel project. Additionally, all blade code to include them will automatically add a version string. This will make sure a new build replaces any cached version that may be present in the browser.
- You can now use jQuery in your blade by using this blade code:
<!DOCTYPE html>
<html lang="{{ str_replace('_', '-', app()->getLocale()) }}">
<head>
    <meta charset="utf-8">
    <meta name="viewport" content="width=device-width, initial-scale=1">
    <title>Laracoding.com - Including jQuery with Laravel Mix</title>
    <link href="{{ mix('css/app.css') }}" rel="stylesheet">
    <script src="{{ mix('js/app.js') }}"></script>
</head>
<body>
    <p class="zoomable">
        Click me to zoom
    </p>
    <script type="module">
        $(document).ready(function(){
            $(".zoomable").click(function(){
                $(this).animate({
                    fontSize: "40px"
                }, 1000);
            });
        });
    </script>
</body>
</html>
That’s it! You have successfully included jQuery in your Laravel project using Laravel Mix.
Laravel Mix is being phased out by the Laravel team in favor of Vite starting with Laravel 9 and later. It is included by default in Laravel 5, 6, 7, and 8, but not in Laravel 9, 10 and later versions. Should you prefer to use Laravel Mix, you can still manually install it by running:
npm install laravel-mixYou’d also need to change your package.json back to what it was in Laravel 8 which you can find here. Otherwise, the npm commands won’t find mix.
Conclusion
In conclusion, there are multiple ways to add jQuery to your Laravel application, depending on your needs and preferences.
If you want to keep things simple, the first method of using the CDN might be the easiest for you. However, if you want to host the file yourself directly adding the jQuery file to the public folder might be a better pick. For more advanced options and features, using either Vite or Laravel Mix can be a great choice, depending on your preference and which version of Laravel you’re using.
Now go ahead and add some great features using jQuery in your own Laravel application. Happy coding!
very helpful, great explanation
I’m glad you found my post helpful, thanks for leaving a comment 🙂
ReferenceError: $ is not defined when using method 3
I really needed this…..thanks a lot