Laravel’s Blade templating engine can be supplemented by adding your own Custom Blade directives which define your own shorthand syntax.
To add a custom blade directive to Laravel Blade, you should include it within the boot() method of the AppServiceProvider using the Blade facade: Blade::directive(‘name’, function($expression)) { return ‘result’}
In this tutorial, we will guide you through the exact steps required to add any custom Blade directive to the AppServiceProvider and how to use it in your blade code.
Furthermore, we’ll show you how to modify the custom directive to support multiple parameters. Finally, we’ll explore how to register the custom directive using a custom service provider instead of the default AppServiceProvider. This approach can be particularly useful as your application grows.
Let’s dive in!
Step 1: Add Custom Blade Directive to AppServiceProvider
Open the AppServiceProvider.php file located in the app/Providers directory. Within the boot method, define your unique Blade directive.
Let’s create a directive, named @currency, that helps format a value as currency:
<?php

namespace App\Providers;

use Illuminate\Support\Facades\Blade;
use Illuminate\Support\ServiceProvider;

class AppServiceProvider extends ServiceProvider
{
    /**
     * Register any application services.
     */
    public function register(): void
    {
        //
    }

    /**
     * Bootstrap any application services.
     */
    public function boot(): void
    {
        Blade::directive('currency', function ($expression) {
            return "<?php echo '$' . number_format($expression, 2); ?>";
        });
    }
}
Step 2: Create a Controller
Now, create a controller, which provides a collection of products and passes it to a view. Execute the following Artisan command:
php artisan make:controller ProductControllerIn the generated ProductController.php file, insert the following code:
<?php

namespace App\Http\Controllers;

class ProductController extends Controller
{
    public function index()
    {
        $products = collect([
            ['name' => 'Laptop', 'price' => 1000.50],
            ['name' => 'Smartphone', 'price' => 800.75],
            // Add more products here
        ]);

        return view('products.index', compact('products'));
    }
}
Step 3: Define a route
Next, we define a route to the index method of the ProductController. Open routes/web.php and add:
<?php

use App\Http\Controllers\ProductController;

Route::get('/products', [ProductController::class, 'index']);
Step 4: Create a View
Now, create a Blade view in resources/views/products/index.blade.php and add the following code:
<!doctype html>
<html lang="en">
<head>
    <title>Custom Blade Directive Example - made with ♥ by laracoding.com</title>
</head>
<body>
    <h1>Product List</h1>
    <ul>
        @foreach ($products as $product)
            <li>
                {{ $product['name'] }} - Price: @currency({{ $product['price'] }}, 'USD')
            </li>
        @endforeach
    </ul>
</body>
</html>
Step 5: View Results in the Browser
- Now run:
php artisan serve- Open your browser and navigate to http://127.0.0.1:8000/products. You should see that it now correctly shows our formatted prices:

That’s it! You’ve successfully added a custom blade directive that formats a currency.
Frequently Asked Questions
How Can I Pass Multiple Parameters to a Blade Directive?
It is possible to pass multiple parameters to a custom blade directive. This allows us to expand the capabilities of our custom @currency directive to support various currencies.
When working with multiple parameters in a custom blade directive, we use the $expression, which contains all parameters separated by commas. By extracting these values using the explode() function, we can access and utilize them as an array, as demonstrated in the example below.
Let’s enhance our @currency directive to support multiple currencies, which can be specified as a second parameter. To achieve this, follow these steps:
- Add or Modify Blade Directive code
<?php

class AppServiceProvider extends ServiceProvider
{
    /**
     * Register any application services.
     */
    public function register(): void
    {
        //
    }

    /**
     * Bootstrap any application services.
     */
    public function boot(): void
    {
        Blade::directive('currency', function ($expression) {
            list($value, $currency) = explode(',', $expression);
            return "<?php echo '$' . number_format($value, 2) . ' ' . $currency; ?>";
        });
    }
}- Using the Custom Blade Directive
<!doctype html>
<html lang="en">
<head>
<title>Custom Blade Directive With Multiple Parameters Example - made with ♥ by laracoding.com</title>
</head>
<body>
<h1>Product List</h1>
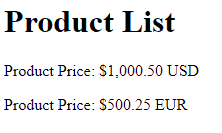
<p>Product Price: @currency(1000.50, 'USD')</p>
<p>Product Price: @currency(500.25, 'EUR')</p>
</body>
</html>- View result:
Run:
php artisan serveThen open the browser and view: http://127.0.0.1:8000/products:
How to Add Custom Blade Directive by Custom ServiceProvider?
We’ve learned how to add our custom directive to Laravel’s AppServiceProvider. If you wish, you can add them to your own ServiceProvider instead. This can further clean up the code, especially when the application grows.
To achieve this follow these steps:
- Run the following artisan command:
php artisan make:provider CustomBladeDirectiveServiceProvider- Edit the Custom Blade Directive
Add custom code to the boot() method of CustomBladeDirectiveServiceProvider as shown below.
<?php

use Illuminate\Support\Facades\Blade;
use Illuminate\Support\ServiceProvider;

class CustomBladeDirectiveServiceProvider extends ServiceProvider
{
    /**
     * Bootstrap any application services.
     */
    public function boot(): void
    {
        Blade::directive('currency', function ($expression) {
            return "<?php echo '$' . number_format($expression, 2); ?>";
        });
    }
}
Note: Should you’ve added the directive to AppServiceProvider earlier, you can now remove it there
- Register the Custom Service Provider
Next, you need to register your custom service provider. Open the config/app.php file and find the ‘providers’ key and add your provider:
<?php

use Illuminate\Support\Facades\Facade;
use Illuminate\Support\ServiceProvider;

return [
    // ... other code

    'providers' => ServiceProvider::defaultProviders()->merge([
        // ... other providers
        App\Providers\CustomBladeDirectiveServiceProvider::class,
    ])->toArray(),

    // ... other code
];- Verify using your browser
Conclusion
Custom directives allow for cleaner and more concise view templates. By adding a custom Blade directive to AppServiceProvider, you’ve added a convenient feature to Laravel Blade to help with formatting prices. Following the outlined procedure you can easily come up with your own custom blade directives and add them. As an exercise, consider implementing code for one of these hypothetical examples:
- @truncate: The truncate directive could truncate a given string to a specified length, adding an ellipsis if the string exceeds the limit. This is useful for displaying summaries or excerpts.
- @youtube: This directive could generate an embedded YouTube video player based on a given video ID. It simplifies the process of embedding videos in your templates
- @countdown: This directive could create a countdown timer to a specified date or time. It’s useful for displaying time-sensitive messages or promotions.
Happy coding!
References
