In some cases, you may want to use only the created_at timestamp in your Laravel application without the updated_at field. This can be achieved by making a few adjustments in your migration and model files.
In Laravel, you can use a created_at without an updated_at timestamp by including only timestamp('created_at')->useCurrent() in the migration file and setting const UPDATED_AT = null in the Model.
In this tutorial, we will walk through the steps to accomplish this. Let’s get started!
Step 1: Creating the Model and Migration
To start, we’ll create a new model and migration simultaneously using the make:model Artisan command. Open your terminal or command prompt and run the following command:
php artisan make:model Post -mReplace Post with the desired name for your model. The -m option generates a migration file along with the model.
Step 2: Modifying the Migration File
Open the migration file generated in the previous step. By default, Laravel includes the timestamps() method, which creates both created_at and updated_at fields. We need to modify this method to include only the created_at field. Additionally, let’s add some example fields that a post might have, such as title and content:
<?php

use Illuminate\Database\Migrations\Migration;
use Illuminate\Database\Schema\Blueprint;
use Illuminate\Support\Facades\Schema;

return new class extends Migration
{
    /**
     * Run the migrations.
     */
    public function up(): void
    {
        Schema::create('posts', function (Blueprint $table) {
            $table->id();
            $table->text('title');
            $table->text('content');
            $table->timestamp('created_at')->useCurrent();
        });
    }

    /**
     * Reverse the migrations.
     */
    public function down(): void
    {
        Schema::dropIfExists('posts');
    }
};
Step 3: Modifying the Model
Open the model file and set the UPDATED_AT property to null. This prevents Eloquent from automatically updating the updated_at field, overriding Laravel’s default behavior.
<?php

namespace App\Models;

use Illuminate\Database\Eloquent\Factories\HasFactory;
use Illuminate\Database\Eloquent\Model;

class Post extends Model
{
    use HasFactory;

    const UPDATED_AT = null;
}
By setting the UPDATED_AT constant to null, Laravel will no longer attempt to update the updated_at field. If this step is overlooked and we try to save a Post model, Laravel will generate an error message such as:
 Illuminate\Database\QueryException  SQLSTATE[42S22]: Column not found: 1054 Unknown column 'updated_at' in 'field list' (Connection: mysql, SQL:
 insert into `posts` (`title`, `content`, `updated_at`, `created_at`) values (Test title, Lorem ipsum is the bomb., 2023-07-14 20:51:47, 2023-07-14 20:51:47)).
Step 4: Running the Migration
Now that we’ve made the necessary changes, it’s time to run the migration and create the table in the database. In your terminal or command prompt, run the following command:
php artisan migrateThis command will execute the migration and create the table with the modified schema.
Step 5: Testing the Model
To ensure that our model is working correctly and that the created_at field is being set as expected, we can use Laravel’s interactive shell, php artisan tinker, to create a new instance of the model and save it to the database.
- Run the following command:
php artisan tinker- Once in the tinker shell, create a new instance of the model and set its attributes. Use the following code as an example:
$p = new App\Models\Post();
$p->title = "Test title";
$p->content = 'Lorem ipsum is the bomb.';
$p->save();- After saving the model, exit the tinker shell by typing
exitor pressingCtrl + D. - Now, open your MySQL command-line tool or any database management tool and connect to your database.
- Run the following query to fetch the records from the
poststable:
SELECT * FROM posts;The query will display the records in the posts table, including the newly created record. You should see the id, title, content, and created_at columns with the corresponding values and that the created_at is set correctly:
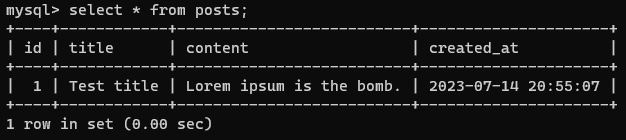
created_at ValueThat’s it! You’ve successfully ensured that your Model Post has a created_at timestamp without an updated_at being present.
How to Add the updated_at Timestamp Column Later?
If you ever need to include the updated_at timestamp column in the future, you can easily modify your existing migration and model files. Follow the steps below:
- Make a new migration by running:
php artisan make:migration add_updated_at_to_posts- Copy and paste the following code and save the migration:
<?php

use Illuminate\Database\Migrations\Migration;
use Illuminate\Database\Schema\Blueprint;
use Illuminate\Support\Facades\Schema;

return new class extends Migration
{
    /**
     * Run the migrations.
     */
    public function up(): void
    {
        Schema::table('posts', function (Blueprint $table) {
            $table->timestamp('updated_at')->useCurrent();
        });
    }

    /**
     * Reverse the migrations.
     */
    public function down(): void
    {
        Schema::table('posts', function (Blueprint $table) {
            $table->dropColumn('updated_at');
        });
    }
};- Open the
PostModel and remove the line:const UPDATED_AT = null;
<?php

namespace App\Models;

use Illuminate\Database\Eloquent\Factories\HasFactory;
use Illuminate\Database\Eloquent\Model;

class Post extends Model
{
}
Conclusion
By following the steps outlined in this tutorial, you can use the created_at timestamp in your Model without the updated_at field and avoid triggering the error “Unknown column ‘updated_at’ in ‘field list'”. By modifying the migration file to use the timestamp('created_at')->useCurrent() method and setting the UPDATED_AT constant to null in the model, you can achieve this desired behavior.
Enjoy this simplified timestamp handling, happy coding!
References:
- Laravel Models: https://laravel.com/docs/eloquent
- Laravel Migrations: https://laravel.com/docs/migrations
- Laravel Tinker: https://laravel.com/docs/artisan#tinker