Being able to import Excel files into Laravel and working with its data in your code opens up a range of potential use cases.
The free package Laravel Excel by Maatwebsite makes working with spreadsheets very straightforward. It has many features to work with CSV and XLSX files like importing them into a database or simply into an array.
In this tutorial, we’ll build a full example Laravel application with a form to upload an Excel file (xlsx). As a demo, we will create a controller that imports the upload into an array and dumps it to the page. You could easily take this a step further and add your custom code to process the data further.
Let’s get started!
Step 1: Install Laravel
Begin by creating a new Laravel project if you haven’t done so already. Open your terminal and run:
composer create-project --prefer-dist laravel/laravel excel-to-arrayStep 2: Install the Laravel Excel Package
Now let’s install the maatwebsite/laravel-excel package using Composer. Open your terminal and run the following command:
composer require maatwebsite/excelStep 3: Create an Excel Import Class
Run the following command to instruct artisan to generate a new Import class:
php artisan make:import MoviesImportStep 4: Add Import Class Code
Open the generated file at app/Imports/MoviesImport.php and replace its default code with:
<?php

namespace App\Imports;

use Maatwebsite\Excel\Concerns\ToArray;

class MoviesImport implements ToArray
{
    public function array(array $array)
    {
        return $array;
    }
}
Step 5: Create the Controller
Next, let’s create the controller that will handle the file upload and Excel import by running:
php artisan make:controller ExcelImportControllerStep 6: Add Controller Code
Open the newly created file at app/Http/Controllers/ExcelImportController.php and add the following code:
<?php

namespace App\Http\Controllers;

use App\Imports\MoviesImport;
use Illuminate\Http\Request;
use Maatwebsite\Excel\Facades\Excel;

class ExcelImportController extends Controller
{
    // Displays the file upload form.
    public function showUploadForm()
    {
        return view('upload');
    }

    // Handles the file upload and Excel import.
    public function import(Request $request)
    {
        // Ensure that the 'file' field is present, is a file and is either in xlsx or xls format
        $request->validate([
            'file' => 'required|file|mimes:xlsx,xls',
        ]);

        $file = $request->file('file');
        $array = Excel::toArray(new MoviesImport, $file);

        dd($array);
    }
}
Step 7: Create a View With File Upload Form
Let’s create a view file to display the file upload form. Create a new file named upload.blade.php in the resources/views directory and add the following code:
<!DOCTYPE html>
<html lang="en">
<head>
    <meta charset="UTF-8">
    <meta name="viewport" content="width=device-width, initial-scale=1.0">
    <title>Excel Import</title>
    <!-- Bootstrap CSS -->
    <link href="https://cdn.jsdelivr.net/npm/bootstrap@5.3.0/dist/css/bootstrap.min.css" rel="stylesheet">
</head>
<body>
<div class="container mt-5">
    <h2>Upload Excel File</h2>
    <form action="{{ route('excel.import') }}" method="POST" enctype="multipart/form-data">
        @csrf
        <div class="mb-3">
            <input class="form-control" type="file" name="file">
        </div>
        <button type="submit" class="btn btn-primary">Import</button>
    </form>
</div>

</body>
</html>
Step 8: Add Routes
Now, let’s define routes to handle file upload and Excel import requests. Open your routes/web.php file and add the following routes:
<?php

use App\Http\Controllers\ExcelImportController;

Route::get('/upload', [ExcelImportController::class, 'showUploadForm'])->name('excel.uploadform');
Route::post('/import', [ExcelImportController::class, 'import'])->name('excel.import');
Step 9: Test the Application
You can now start development server for testing by running:
php artisan serveThen, open your browser and navigate to http://127.0.0.1:8000/upload to access the file upload form. Upload an Excel file, and the controller will import its data into an array and dump it for testing purposes.
It should look as follows:
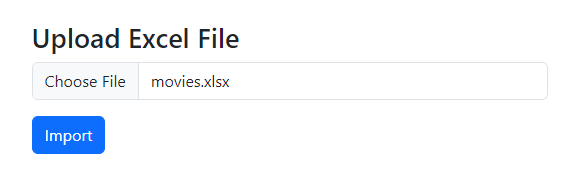
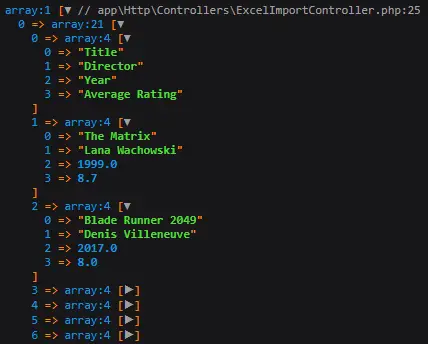
That’s it! You’ve successfully imported your uploaded spreadsheet into an array!
Conclusion
In this tutorial, we’ve covered the process of importing Excel data into an array using Maatwebsite’s Laravel Excel package. We began by installing the necessary dependencies and creating a controller to handle the file upload and import. We then created a simple view for uploading Excel files and defined routes to handle the upload process.
If you have any questions or like to share how you use this package, feel free to leave a comment below. Happy coding!
References
- Laravel Excel Installation (Laravel Excel Documentation)
- Importing to array or collection (Laravel Excel Documentation)
Thank you for your tutorial. It has really helped. I apreciate it
I’m glad you’ve found the post useful, thanks for letting me know, 🙂