In Laravel, seeding your database after migration is a common practice to initialize your application with specific initial data.
This blog post will explore two approaches:
- Running a Migrate and a Separate Seed Command
- Adding Seeding Code Directly to the Migration
up()Method
We’ll be using an example table that stores project statuses and we’ll populate the table with values such as “In Progress,” “Completed,” “On Hold,” and “Pending Approval” using both methods of seeding.
Now, let’s have a look at each of these methods and see how they differ in practice.
Method 1: Running a Migrate and a Separate Seed Command
Step 1: Create a Model
Create a ProjectStatus Model by running:
php artisan make:model ProjectStatusAfter that, add the following code, to make the columns mass assignable:
<?php

namespace App\Models;

use Illuminate\Database\Eloquent\Model;

class ProjectStatus extends Model
{

    protected $fillable = [
        'name',
        'created_at',
        'updated_at',
    ];
}
Step 2: Create a Migration
Start by generating a migration and seeder using the following Artisan commands:
php artisan make:migration create_project_statuses_table --create=project_statusesAdd the following code to the generated migration file:
<?php

use Illuminate\Database\Migrations\Migration;
use Illuminate\Database\Schema\Blueprint;
use Illuminate\Support\Facades\Schema;

return new class extends Migration
{
    public function up(): void
    {
        Schema::create('project_statuses', function (Blueprint $table) {
            $table->id();
            $table->string('name');
            $table->timestamps();
        });
    }

    public function down(): void
    {
        Schema::dropIfExists('project_statuses');
    }
};
Step 3: Create a Seeder
Create a Seeder using Artisan by running:
php artisan make:seeder ProjectStatusesSeederStep 4: Add Seeder Code
In the generated seeder file, add this code:
<?php

namespace Database\Seeders;

use Illuminate\Database\Seeder;
use Illuminate\Support\Carbon;
use Illuminate\Support\Facades\DB;

class ProjectStatusesSeeder extends Seeder
{
    public function run()
    {
        $now = Carbon::now();
        DB::table('project_statuses')->insert([
            ['name' => 'In Progress', 'created_at' => $now, 'updated_at' => $now],
            ['name' => 'Completed', 'created_at' => $now, 'updated_at' => $now],
            ['name' => 'On Hold', 'created_at' =>$now, 'updated_at' => $now],
            ['name' => 'Pending Approval', 'created_at' => $now, 'updated_at' => $now],
        ]);
    }
}
Step 5: Run Seeder Using Separate Artisan Command
Run the migrate and seed by running these 2 commands:
php artisan migrate
php artisan db:seed --class=ProjectStatusesSeeder
Now the project_statuses table is filled with its initial data:
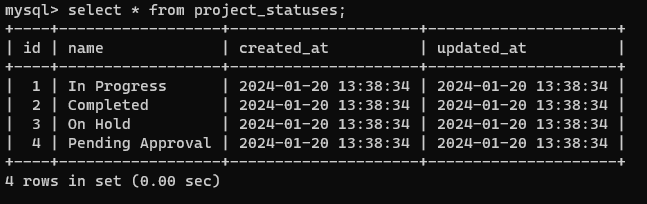
project_statuses Table Filled With Our Initial Statuses as Defined in ProjectStatusesSeederMethod 2: Adding Seeding Code Directly to the Migration up() Method
Step 1: Create a Model
Run the following artisan command to create the Model:
php artisan make:model ProjectStatusAdd the following code to make the name column mass assignable:
<?php

namespace App\Models;

use Illuminate\Database\Eloquent\Model;

class ProjectStatus extends Model
{
    protected $fillable = [
        'name'
    ];
}
Step 2: Create a Migration
Generate a migration using the following Artisan command:
php artisan make:migration create_project_statuses_table --create=project_statusesIn the generated migration file, define the columns by adding this code:
<?php

use Illuminate\Database\Migrations\Migration;
use Illuminate\Database\Schema\Blueprint;
use Illuminate\Support\Facades\Schema;

return new class extends Migration
{
    public function up(): void
    {
        Schema::create('project_statuses', function (Blueprint $table) {
            $table->id();
            $table->string('name');
            $table->timestamps();
        });

        $statuses = ['In Progress', 'Completed', 'On Hold', 'Pending Approval'];
        foreach ($statuses as $status) {
            ProjectStatus::create(['name' => $status]);
        }
    }

    public function down(): void
    {
        Schema::dropIfExists('project_statuses');
    }
};
Step 3: Run the Migration and Seed in One Command
Now let’s execute the following migrate command to both create the table and seed it with data:
php artisan migrateNow the project_statuses table is filled with its initial data:
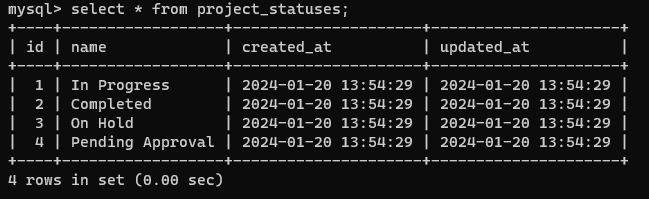
project_statuses Table Filled With Our Initial Statuses as Defined in the Migration up() methodConclusion
Seeding right after migrating is beneficial when your application requires a table filled with specific initial data. You can either trigger a seeder using a separate command or you can embed the seeding logic within the migration file. Both methods ensure a well-structured and populated database, and the choice is yours.
The main advantage of method 2, running the seeding right in the migrations up() method, is that it simplifies the setup project for others working on the project. They won’t need to follow as many steps or require detailed instructions to get everything up and running smoothly.
The advantage of method 1, running the seeder as a separate command, is that it is more in line with common practices of Laravel developers and the official Laravel documentation.
Feel free to experiment with these methods in your own project and discover which approach works best for you. Happy coding!
References
- Migrations (Laravel Documentation)
- Seeding (Laravel Documentation)

you can try:
> php artisan migrate:fresh –seed
is in one command.