Phone number validation can be tricky since every country has their own formats. Luckily we can easily add third party functionality to our Laravel app by installing third party packages using composer.
In this tutorial, we’ll learn how to install the package “Laravel Phone” to validate phone numbers as entered into our Laravel forms. We’ll create a example application that allows us to save only valid phone numbers in the database.
Let’s get started!
Step 1: Install Laravel
First, install Laravel by running the following command in your terminal:
composer create-project --prefer-dist laravel/laravel phone-validationStep 2: Install Laravel Phone Package
Now, install Laravel Phone by running the following command:
composer require propaganistas/laravel-phoneStep 3: Create Model and Migration
Generate a model and migration for our phone numbers table using artisan:
php artisan make:model PhoneNumber -mThis command creates a PhoneNumber model and its corresponding migration file.
Step 4: Add Migration Code
Open the migration file at database/migrations/yyyy_mm_dd_create_phone_numbers_table.php and the following code to define the schema for the phone numbers table:
use Illuminate\Database\Migrations\Migration;
use Illuminate\Database\Schema\Blueprint;
use Illuminate\Support\Facades\Schema;

class CreatePhoneNumbersTable extends Migration
{
    public function up()
    {
        Schema::create('phone_numbers', function (Blueprint $table) {
            $table->id();
            $table->string('phone_number');
            $table->timestamps();
        });
    }

    public function down()
    {
        Schema::dropIfExists('phone_numbers');
    }
}
Step 5: Run the Migration
Now lets run the migration to create the phone_numbers table in the database by running:
php artisan migrateStep 6: Add Model Code
In the PhoneNumber model (app/Models/PhoneNumber.php), specify the property phone_number is a fillable fields for mass assignment. This will make it easier to assign a value using Eloquent’s create method later on.
Make sure your PhoneNumber code contains the following code:
<?php

namespace App\Models;

use Illuminate\Database\Eloquent\Model;

class PhoneNumber extends Model
{
    protected $fillable = [
        'phone_number',
    ];
}
Step 7: Create the Controller
Generate a controller named PhoneNumberController.php by running the following artisan command:
php artisan make:controller PhoneNumberControllerStep 8: Add Controller Code
Now open the generated controller at app/Http/Controller/PhoneNumberController.php and add the following code:
<?php

namespace App\Http\Controllers;

use App\Models\PhoneNumber;
use Illuminate\Http\Request;

class PhoneNumberController extends Controller
{
    public function index()
    {
        return view('phone-number');
    }

    public function store(Request $request)
    {
        $request->validate([
            // Allow only phone numbers from the US and the UK
            'phone_number' => 'required|phone:US,UK',
        ]);

        PhoneNumber::create([
            // Retrieve a sanitized value using $request->input
            'phone_number' => $request->input('phone_number'),
        ]);

        return redirect()->back()->with('success', 'Phone number saved successfully.');
    }
}
Step 9: Create the View
Now create a view file to render our form in which the user can enter a phone number by adding a new file at resources/views/phone-number.blade.php and adding the following code:
<!DOCTYPE html>
<html lang="en">
<head>
    <meta charset="UTF-8">
    <meta name="viewport" content="width=device-width, initial-scale=1.0">
    <title>Phone Number Form</title>
    <link href="https://cdn.jsdelivr.net/npm/bootstrap@5.3.2/dist/css/bootstrap.min.css" rel="stylesheet">
</head>
<body>

<div class="container mt-5">

    <!-- Display success message if it exists -->
    @if(session('success'))
        <div class="alert alert-success">{{ session('success') }}</div>
    @endif

    <h2>Enter Phone Number</h2>

    <form action="{{ route('phone-number.store') }}" method="POST">
        @csrf
        <div class="mb-3">
            <label for="phone_number" class="form-label">Phone Number</label>
            <input type="text" class="form-control" id="phone_number" name="phone_number">

            <!-- Display validation errors if any -->
            @error('phone_number')
            <div class="text-danger">
                <small>{{ $message }}</small>
            </div>
            @enderror
        </div>
        <button type="submit" class="btn btn-primary">Submit</button>
    </form>
</div>

</body>
</html>
Step 10: Add Routes
Now open routes/web.php and define a “get” route to load the form and a “post” route to receive the form with the submitted phone number and send them to the correct method in PhoneNumberController:
<?php

use Illuminate\Support\Facades\Route;
use App\Http\Controllers\PhoneNumberController;

Route::get('/phone-number', [PhoneNumberController::class, 'index'])->name('phone-number.index');
Route::post('/phone-number', [PhoneNumberController::class, 'store'])->name('phone-number.store');
Step 11: Add a Custom Error Message (Optional)
Now default Laravel doesn’t have a proper error message for the field and will return a placeholder message, which looks a bit silly and confusing for the user:
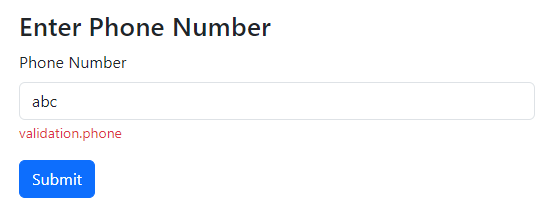
To fix this you can do one of these 2 things:
Option 1: Manually set a custom message in the validate() call
$request->validate([
// Allow only phone numbers from the US and the UK
'phone_number' => 'required|phone:NL',
], [
// Set a custom validation error message
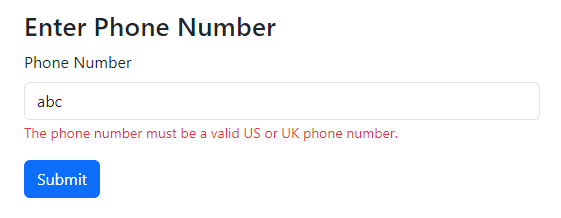
'phone_number.phone' => 'The phone number must be a valid US or UK phone number.',
]);This is probably the simplest method. This way it is not reusable for other forms though and you will have issues with multi language applications.
Option 2: Add the proper message to the language file
This method is more flexible as it is reusable for multiple forms and it allows adding translations if needed.
First run this command to make artisan create a “lang” folder with all supported messages:
php artisan lang:publishNow we can add our own messages by opening the file at lang/en/validation.php and adding:
<?php

return [
    // .. other messages ...

    'phone' => 'The :attribute field must be a valid phone number.',

    // .. other messages ...
];
Step 12: Test the Application
Now let’s test the application. First run the development server:
php artisan serveThen, open your browser and navigate to http://127.0.0.1:8000/phone-number to access the form. You may enter various phone numbers and submit the form to ensure that validation and formatting work correctly.
Depending on our input we’d either see a validation error for an invalid phone number like this:
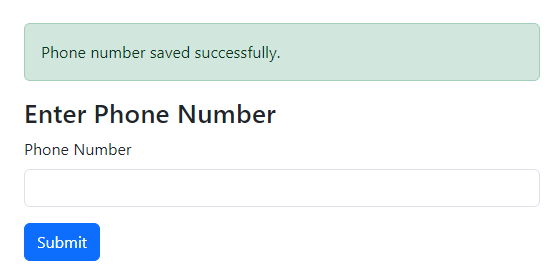
Or we’d see a success message like the one below. In this case it is inserted in the database as well.
Conclusion
By using the third party Laravel Phone package, you can easily validate and format phone numbers in formats of various countries.
By following the steps in this tutorial, you can now confidently add phone number validation to your own Laravel applications. Happy coding!
References
- propaganistas/laravel-phone (Github Page With Documentation)
- Writing Validation Logic (Laravel Documentation)
