In this tutorial we’ll show you how to add Google reCAPTCHA v3 to a simple contact form in Laravel. By following the step-by-step instructions provided, you’ll be able to protect your forms from bot abuse.
Unlike previous versions of reCAPTCHA, v3 eliminates the need for users to perform additional verification tasks, ensuring an excellent user experience. Let’s dive in and learn how to safeguard your Laravel forms against bots.
Step 1: Prerequisites
Before we begin, make sure you have the following prerequisites:
- Laravel installed on your local development environment
- A Google account
Step 2: Create a Google reCAPTCHA v3 Site
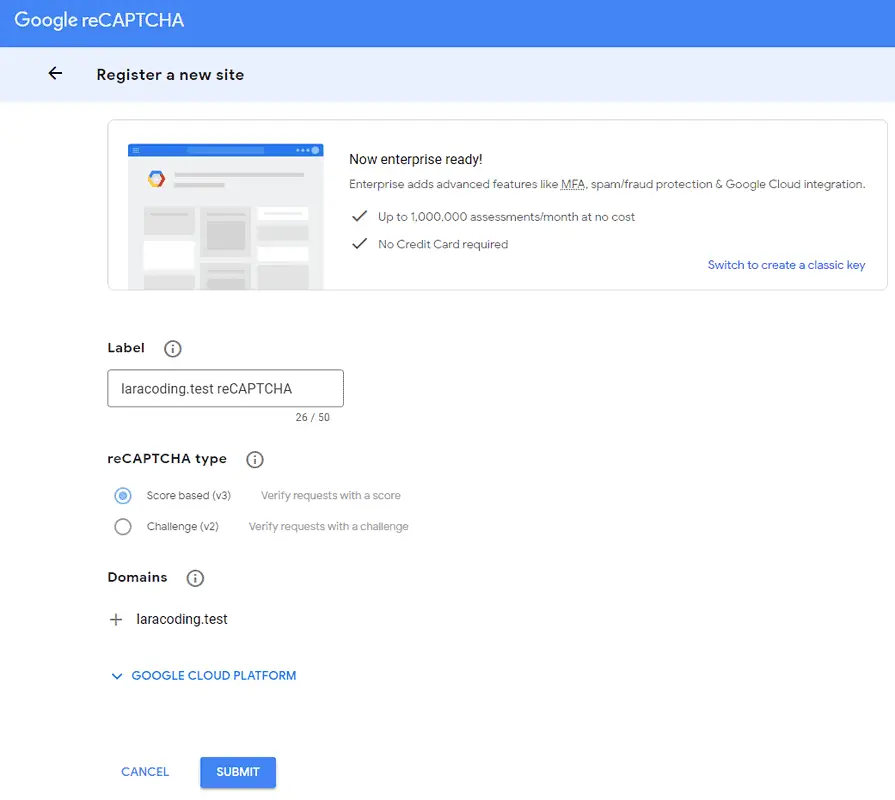
Go to the Google reCAPTCHA Admin Console and sign in with your Google account. Create a new reCAPTCHA site by providing a label and adding the domain where your Laravel application is hosted. Make sure you select the type “v3 Score based”.
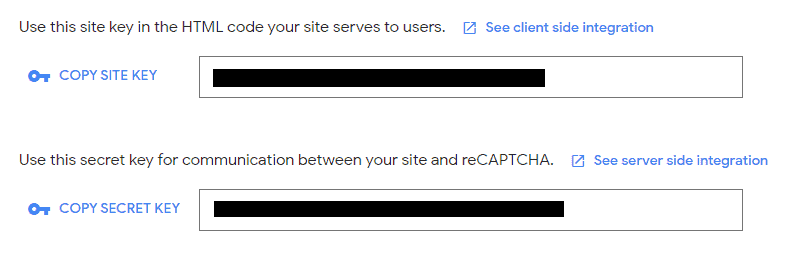
Take note of the Site Key and Secret Key generated for your site, as we will need them later in the tutorial.
After successfully adding our site, Google will provide you with a Site Key and Secret:
Step 3: Configure the Environment Variables
Open the .env file located in the root directory of your Laravel project. Insert the following environment variables:
RECAPTCHA_V3_SITE_KEY=YOUR_SITE_KEY
RECAPTCHA_V3_SECRET_KEY=YOUR_SECRET_KEY
Replace 'RECAPTCHA_V3_SITE_KEY' and 'RECAPTCHA_V3_SECRET_KEY' with your actual Site Key and Secret Key, as obtained in Step 2.
Step 4: Add variables to the Laravel Configuration
Open /config/services.php and add your key and secret to the array, as shown below:
return [

    /*
    |--------------------------------------------------------------------------
    | Third Party Services
    |--------------------------------------------------------------------------
    |
    | This file is for storing the credentials for third party services such
    | as Mailgun, Postmark, AWS and more. This file provides the de facto
    | location for this type of information, allowing packages to have
    | a conventional file to locate the various service credentials.
    |
    */

    // .. Other services ..

    // Configure Google ReCAPTCHA v3 key+secret
    'recaptcha_v3' => [
        'siteKey' => env('RECAPTCHA_V3_SITE_KEY'),
        'secretKey' => env('RECAPTCHA_V3_SECRET_KEY'),
    ]
];
We include these variables here so that we can access them later on in our code using
config('services.recaptcha_v3.siteKey')andconfig('services.recaptcha_v3.secretKey').While you could also use
env('RECAPTCHA_V3_SITE_KEY')andenv('RECAPTCHA_V3_SECRET_KEY'), it is not recommended as it can potentially break your application when config caching is enabled. To learn more about this, please refer to the article: The Safe Way to Use env Variables in Laravel.
Step 5: Create a Blade File With the Form Code
To add Google reCAPTCHA v3 to your Laravel Form you need to:
- To include the Google reCAPTCHA API (from: google.com/recaptcha/api.js)
- Add a function
onSubmit()that is triggered by the callback and simply submits the form - Add the following attributes to your HTML submit button:
- Add the CSS class
g-recaptcha. - Add the attribute
data-sitekeyand set its value to the site key from your configuration. - Add the attribute
data-callbackand set its value to the name of the callback function (onSubmit()in this example).
- Add the attribute
data-actionand assign a name value. For example, you could usesubmitContact.
- Add the CSS class
Here’s a full example blade file that demonstrates the usage of reCAPTCHA v3 in a simple contact form. The example uses Bootstrap 5 to achieve a nice layout and style, but the code can work without it as well. Create a new file named contact.blade.php in the resources/views directory, copy and paste the code, and proceed to the next step:
<!doctype html>
<html lang="en">
<head>
    <title>Laracoding.com - Google reCAPTCHA V3 Example</title>
    <meta charset="utf-8">
    <meta name="viewport" content="width=device-width, initial-scale=1">

    <!-- CSS -->
    <link href="https://cdn.jsdelivr.net/npm/bootstrap@5.0.2/dist/css/bootstrap.min.css"
          rel="stylesheet">

    <!-- JS -->
    <script src="https://cdn.jsdelivr.net/npm/bootstrap@5.0.2/dist/js/bootstrap.bundle.min.js"></script>
    <script src="https://www.google.com/recaptcha/api.js"></script>
    <script>
        function onSubmit(token) {
            document.getElementById("contactForm").submit();
        }
    </script>
</head>
<body>
<div class="container mt-5">
    <div class="col-md-6 col-md-offset-3">

        @if(session()->has('message'))
            <div class="alert alert-success">
                {{ session()->get('message') }}
            </div>
        @endif
        @if ($errors->any())
            <div class="alert alert-danger" role="alert">
                <ul class="mb-0 mt-0">
                    @foreach ($errors->all() as $error)
                        <li>{{ $error }}</li>
                    @endforeach
                </ul>
            </div>
        @endif

        <div class="card">
            <div class="card-header text-center">
                Laracoding.com - Google reCaptcha V3 Example
            </div>

            <div class="card-body">
                <div class="container py-4">
                    <form id="contactForm" method="post" action="{{ route('contact.send') }}">
                        @csrf

                        <!-- Name input -->
                        <div class="mb-3">
                            <label class="form-label" for="name">Name</label>
                            <input class="form-control" id="name" type="text" name="name" placeholder="Name"/>
                        </div>

                        <!-- Email address input -->
                        <div class="mb-3">
                            <label class="form-label" for="email">Email Address</label>
                            <input class="form-control" id="email" type="email" name="email"
                                   placeholder="Email Address"/>
                        </div>

                        <!-- Message input -->
                        <div class="mb-3">
                            <label class="form-label" for="message">Message</label>
                            <textarea class="form-control" id="message" type="text" name="message" placeholder="Message"
                                      style="height: 10rem;"></textarea>
                        </div>

                        <!-- Form submit button, including reCAPTCHA V3 attributes -->
                        <div class="d-grid">
                            <button class="g-recaptcha btn btn-primary btn-lg "
                                    data-sitekey="{{ config('services.recaptcha_v3.siteKey') }}"
                                    data-callback="onSubmit"
                                    data-action="submitContact">Submit</button>
                        </div>
                    </form>
                </div>
            </div>

            <div class="card-footer text-center">
                Made with ❤ by laracoding.com
            </div>
        </div>
    </div>
</div>
</body>

</html>
Step 6: Create a Custom Validation Rule Class
Run the following artisan command to create a custom validation rule.
php artisan make:rule ReCaptchaV3Step 7: Add ReCAPTCHA Verification Code to Custom Rule Class
Open the file located at /app/Rules/ReCaptchaV3.php and paste the following code. This will add a validation rule to your Laravel application, which can be easily applied to any form validation you require in your application.
<?php

namespace App\Rules;

use Closure;
use Illuminate\Contracts\Validation\ValidationRule;
use Illuminate\Support\Facades\Http;

class ReCaptchaV3 implements ValidationRule
{
    public function __construct(
        private ?string $action = null,
        private ?float $minScore = null)
    {
    }

    /**
     * Run the validation rule.
     *
     * @param string $attribute
     * @param mixed $value
     * @param Closure $fail
     */
    public function validate(string $attribute, mixed $value, Closure $fail): void
    {
        // Send a POST request to the google siteverify service to validate the
        $siteVerify = Http::asForm()
            ->post('https://www.google.com/recaptcha/api/siteverify', [
                'secret' => config('services.recaptcha_v3.secretKey'),
                'response' => $value,
            ]);

        // This happens if google denied our request with an error
        if ($siteVerify->failed()) {
            $fail('Google reCAPTCHA was not able to verify the form, please try again.');
            return;
        }

        // This means Google successfully processed our POST request. We still need to check the results!
        if ($siteVerify->successful()) {
            $body = $siteVerify->json();

            // When this fails it means the browser didn't send a correct code. This means it's very likely a bot we should block
            if ($body['success'] !== true) {
                $fail('Your form submission failed the Google reCAPTCHA verification, please try again.');
                return;
            }

            // When this fails it means the action didn't match the one set in the button's data-action.
            // Either a bot or a code mistake. Compare form data-action and value passed to $action (should be equal).
            if (!is_null($this->action) && $this->action != $body['action']) {
                $fail('The action found in the form didn\'t match the Google reCAPTCHA action, please try again.');
                return;
            }

            // If we set a minScore treshold, verify that the spam score didn't go below it
            // More info can be found at: https://developers.google.com/recaptcha/docs/v3#interpreting_the_score
            if (!is_null($this->minScore) && $this->minScore > $body['score']) {
                $fail('The Google reCAPTCHA verification score was too low, please try again.');
                return;
            }
        }
    }
}
Using Google reCAPTCHA v3 involves sending a validation request from our server-side PHP code to the Google server. We use Laravel’s built-in Http facade to post the value in the validate function of our validation rule class. If we do not receive a response or if the success value is reported as false, we consider the validation to have failed. Additionally, we can apply optional validation for the correct $action and a threshold in $minScore, which I will explain further later on.
Step 8: Apply Form Validation Rule in Your Controller
To add form validation in a Controller, follow these steps:
- Run the following artisan command to create a new controller:
php artisan make:controller ContactUsController- Open the ContactUsController and insert the provided code:
<?php

namespace App\Http\Controllers;

use App\Rules\ReCaptchaV3;
use Illuminate\Http\Request;

class ContactUsController extends Controller
{
    /**
     * Shows the contact page with the contact form
     */
    public function index()
    {
        return view('contact');
    }

    /**
     * Processes the contact form post
     */
    public function send(Request $request)
    {
        $this->validate($request, [
            'name' => ['required', 'string', 'max:50'],
            'message' => ['required', 'string', 'max:500'],
            'email' => ['required', 'email:rfc'],
            'g-recaptcha-response' => ['required', new ReCaptchaV3('submitContact')]
        ]);

        // RecaptCha V3 and other rules have passed, safe to continue

        // Here you can add code to actually send the email message

        return redirect()->back()->with('message', 'Thank you for contacting us. Your message has been sent. ');
    }
}
Note: You can choose from different variations to adjust the level of bot detection:
- Basic validation: Ensures that a valid code was provided by the browser through the recaptcha/api.js anti-bot mechanism.
'g-recaptcha-response' => ['required', new ReCaptchaV3()]- Stricter verification: In addition to code validation, it verifies that the form
data-actionand the action reported by Google both match ‘submitContact’.
'g-recaptcha-response' => ['required', new ReCaptchaV3('submitContact')]Even stricter verification: data-action must match, and the bot score reported back by Google must be higher than 0.5.
'g-recaptcha-response' => ['required', new ReCaptchaV3('submitContact', 0.5)]For more information on correctly interpreting the score values, refer to the Google reCAPTCHA v3 documentation.
Step 9: Add Routes
Open your web route file at app/routes/web.php and add:
Route::get('/contact-us', ['App\Http\Controllers\ContactUsController', 'index'])->name('contact.index');
Route::post('/contact-us', ['App\Http\Controllers\ContactUsController', 'send'])->name('contact.send');
Step 10: Test the form
Run the command below to:
php artisan serveOpen the url in your browser, for example http://127.0.0.1:8000/contact-us
Now you should see the form shown below. Note that in the lower right corner, it shows a reCAPTCHA logo, this indicates that the recaptcha/api.js file loaded correctly.
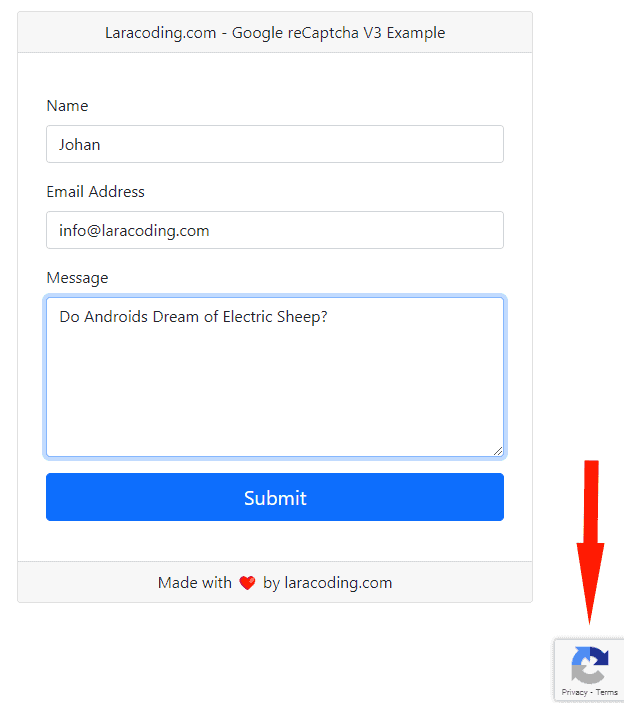
Now if we submit the form our rule verifies that your browser request was not sent by a bot and proceed accordingly.
Note that, in this example, we don’t actually send an E-mail but just display a success message:
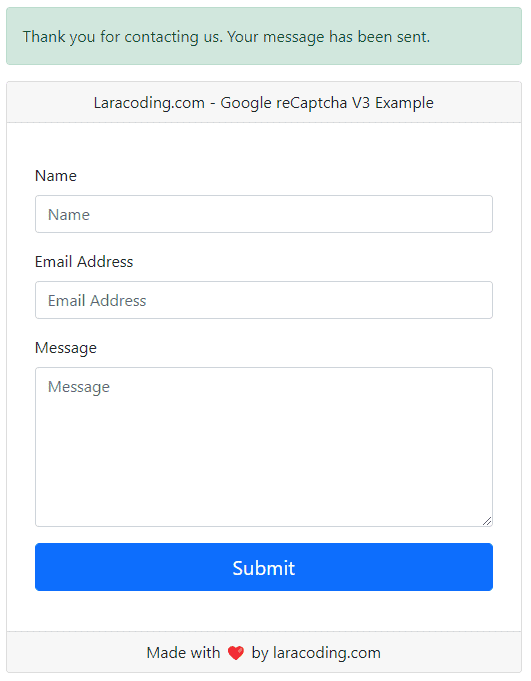
That’s it! We’ve successfully protected the form against bots.
Conclusion
In this tutorial, you learned how to integrate Google reCAPTCHA v3 into your Laravel form for anti-bot verification. By following the provided steps, you can effectively secure your Laravel applications against automated bot submissions.
Now, go ahead and implement reCAPTCHA v3 in your forms. Happy coding!
This entry is part 2 of 4 in the series Google Integration
- How to Send Email With Laravel Using Gmail
- How to Add Google reCAPTCHA v3 to Your Laravel Form
- How to Add Google Analytics 4 (GA4) Tracking Code to Laravel
- How to Use Google Authenticator 2FA in Laravel

Thanks for the demo. Really clear and easy to follow.
Any tutorials about using the recaptcha with a livewire component?
Thanks for your kind words, I’m glad you’ve found it useful. I haven’t written any livewire tutorials yet. But since livewire is awesome, I will definitely post about it at some point 🙂
Thank you. I had issues with other libraries that should work with Recaptcha v3. Your guide worked perfectly 😀
Many thanks
Tim
You’re most welcome!