Tired of password fatigue? Luckily we can offer users the option to log in with an existing account!
In this step-by-step guide, I’ll show you how to quickly add a ‘Login With GitHub’ option to your Laravel application using the Laravel Socialite package.
For simplicity and development speed, we’ll use Laravel Jetstream’s authentication scaffolding in this tutorial. This way we can easily generate a basic dashboard with navigation and a working login form. However, Jetstream is not required to add Socialite and log in with GitHub.
Now let’s walk through the steps involved in adding GitHub to your login form!
Step 1: Install Laravel
If you haven’t already, create a new Laravel project using Composer:
composer create-project laravel/laravel github-login-appThen, navigate to your project directory:
cd github-login-appStep 2: Install Jetstream
First, let’s install Laravel Jetstream to use its scaffolding to generate a starting point from where we can add the feature to log in with GitHub.
To install Jetstream, run the following artisan command:
composer require laravel/jetstreamPublish Jetstream’s assets and execute its installation with this command:
php artisan jetstream:install livewireFollow the prompts to set up Jetstream according to your preferences.
Step 3: Install Socialite
Next, we’ll install Laravel Socialite using composer and migrate the database tables needed by Socialite by running the following commands:
composer require laravel/socialite
php artisan migrate
Step 4: Create GitHub Client Credentials
Before adding the GitHub login feature to your Laravel site, you need to create an OAuth2 App using your GitHub account. To do this, follow these steps:
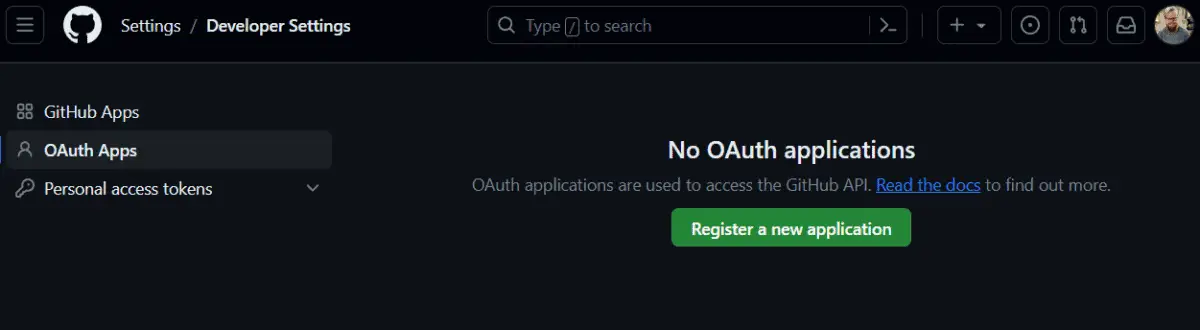
- Open the “GitHub Developer Settings” at https://github.com/settings/developers
- In the left-side navigation, click on OAuth Apps
- Click “Register a new application”
- Fill in the required details
- For Application name, use a name of your choice
- For Homepage URL, use http://127.0.0.1:8000
- For Authorization callback URL, use: http://127.0.0.1:8000/auth/github/callback
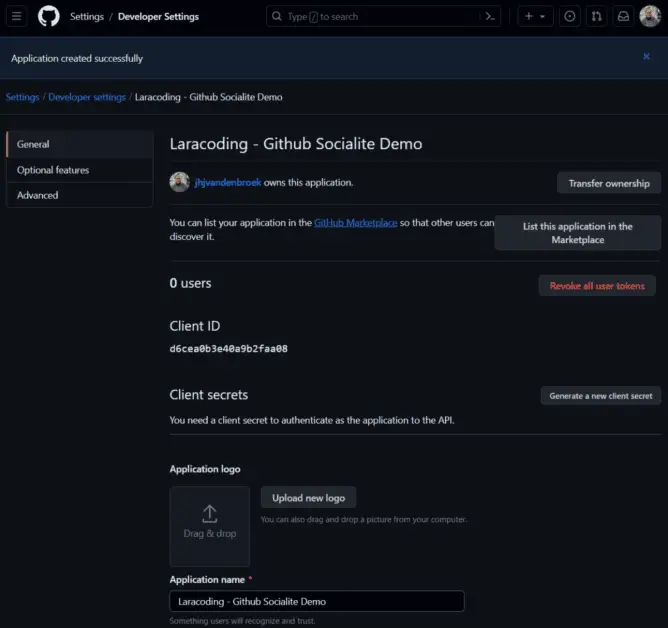
- The next screen will show your newly created client and its “client ID”
- Click “Generate a new client secret”
- In the next screen, copy both the “client ID” and “client secret” for the next step
To guide you through the steps listed above, I’ve included screenshots of the entire process below:

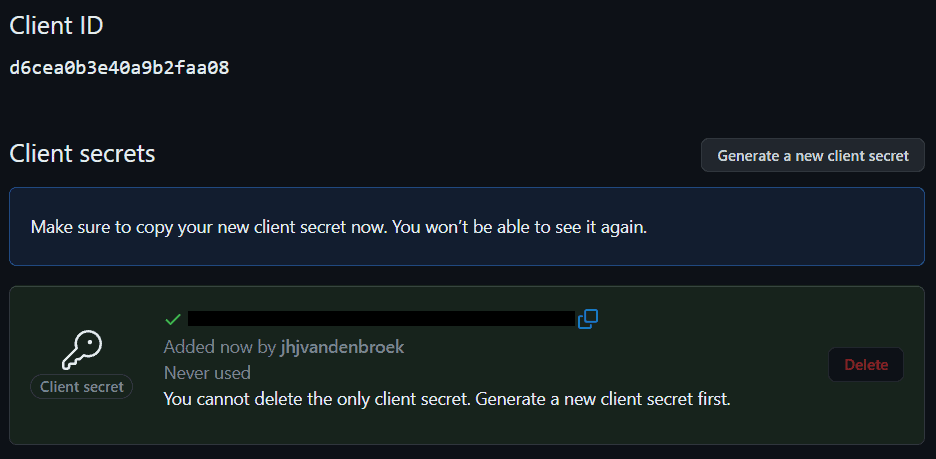
Make sure to have both the Client ID and Secret copied and ready for the next step.
Step 5: Add GitHub App Credentials to the Config
In your Laravel application, open the config/services.php file, and add the following array+keys to configure our GitHub OAuth client credentials:
<?php

return [
    // .. rest of the services

    // GitHub service credentials
    'github' => [
        'client_id' => env('GITHUB_CLIENT_ID'),
        'client_secret' => env('GITHUB_CLIENT_SECRET'),
        'redirect_url' => env('GITHUB_CALLBACK_URL'),
    ],
];
Set these values in your .env file based on the GitHub OAuth client credentials you obtained in the previous step:
GITHUB_CLIENT_ID=YOUR_CLIENT_ID
GITHUB_CLIENT_SECRET=YOUR_CLIENT_SECRET
GITHUB_CALLBACK_URL="http://127.0.0.1/auth/github/callback"
Step 6: Add Database Column to Store github_id
Now we’ll add a migration to change your users table in the database by creating a migration to add a github_id column. To do this, run the following artisan command:
php artisan make:migration add_github_id_to_usersThen open the generated migration file and modify the up and down methods as follows:
<?php

use Illuminate\Database\Migrations\Migration;
use Illuminate\Database\Schema\Blueprint;
use Illuminate\Support\Facades\Schema;

return new class extends Migration
{
    /**
     * Run the migrations.
     */
    public function up(): void
    {
        Schema::table('users', function (Blueprint $table) {
            $table->string('github_id')->after('remember_token')->nullable()->unique();
        });
    }

    /**
     * Reverse the migrations.
     */
    public function down(): void
    {
        Schema::table('users', function (Blueprint $table) {
            $table->dropColumn('github_id');
        });
    }
};
Explanation: The ‘github_id’ column is added to your user database to uniquely associate users with their GitHub accounts. When a user logs in with GitHub, their GitHub-provided ‘github_id’ will be stored in this column, allowing your application to recognize and authenticate them in the future.
Now run the migration to update your database accordingly:
php artisan migrateStep 7: Modify the User Model
Now modify your User model by opening app/Models/User.php. Make the github_id column fillable for mass assignment by adding it to the $fillable array:
<?php

namespace App\Models;

use Illuminate\Contracts\Auth\MustVerifyEmail;
use Illuminate\Database\Eloquent\Factories\HasFactory;
use Illuminate\Foundation\Auth\User as Authenticatable;
use Illuminate\Notifications\Notifiable;
use Laravel\Fortify\TwoFactorAuthenticatable;
use Laravel\Jetstream\HasProfilePhoto;
use Laravel\Sanctum\HasApiTokens;

class User extends Authenticatable
{
    use HasApiTokens;
    use HasFactory;
    use HasProfilePhoto;
    use Notifiable;
    use TwoFactorAuthenticatable;

    /**
     * The attributes that are mass assignable.
     *
     * @var array<int, string>
     */
    protected $fillable = [
        'name',
        'email',
        'password',
        'github_id', // Add 'github_id' to the fillable array.
    ];

    /**
     * The attributes that should be hidden for serialization.
     *
     * @var array<int, string>
     */
    protected $hidden = [
        'password',
        'remember_token',
        'two_factor_recovery_codes',
        'two_factor_secret',
    ];

    /**
     * The attributes that should be cast.
     *
     * @var array<string, string>
     */
    protected $casts = [
        'email_verified_at' => 'datetime',
    ];

    /**
     * The accessors to append to the model's array form.
     *
     * @var array<int, string>
     */
    protected $appends = [
        'profile_photo_url',
    ];
}
Step 8: Create GithubController
We will now create the GithubController, which will manage the interactions between our Laravel application and GitHub’s authentication services. This controller contains a method to redirect users to GitHub for logging in, as well as a method to handle the callback from GitHub, which is triggered when the user authorizes access.
Now, let’s generate the controller by running this artisan command:
php artisan make:controller GithubControllerNow open app/Http/Controllers/GithubController.php, and add the redirect and callback methods to handle GitHub login and callback:
<?php

namespace App\Http\Controllers;

use App\Models\User;
use Illuminate\Http\RedirectResponse;
use Illuminate\Support\Str;
use Laravel\Socialite\Facades\Socialite;

class GithubController extends Controller
{
    public function redirect(): RedirectResponse
    {
        return Socialite::driver('github')->redirect();
    }

    public function callback(): RedirectResponse
    {
        $user = Socialite::driver('github')->user();
        $githubUser = User::updateOrCreate([
            'github_id' => $user->id
        ], [
            'name' => $user->name,
            'email' => $user->email,
            'password' => bcrypt(request(Str::random())) // Set some random password
        ]);

        // Log in the new or updated user.
        auth()->login($githubUser, true);

        // Redirect to url as requested by user, if empty use /dashboard page as generated by Jetstream
        return redirect()->intended('/dashboard');
    }
}
Step 9: Add Routes
Add routes to define Github login and callback endpoints in your routes/web.php file as shown below:
<?php

use App\Http\Controllers\GithubController;
use Illuminate\Support\Facades\Route;

/*
|--------------------------------------------------------------------------
| Web Routes
|--------------------------------------------------------------------------
|
| Here is where you can register web routes for your application. These
| routes are loaded by the RouteServiceProvider and all of them will
| be assigned to the "web" middleware group. Make something great!
|
*/

Route::get('/', function () {
    return view('welcome');
});

Route::middleware([
    'auth:sanctum',
    config('jetstream.auth_session'),
    'verified'
])->group(function () {
    Route::get('/dashboard', function () {
        return view('dashboard');
    })->name('dashboard');
});

// GithubController redirect and callback urls
Route::get('/auth/github', [GithubController::class, 'redirect'])->name('auth.github');
Route::get('/auth/github/callback', [GithubController::class, 'callback']);
Step 10: Update Login Blade File
In this step, we will update the login page UI to include a GitHub login button.
Edit the resources/views/auth/login.blade.php to add a button to sign in with GitHub, as shown in the code sample below:
<x-guest-layout>
    <x-authentication-card>
        <x-slot name="logo">
            <x-authentication-card-logo />
        </x-slot>

        <x-validation-errors class="mb-4" />

        @if (session('status'))
            <div class="mb-4 font-medium text-sm text-green-600">
                {{ session('status') }}
            </div>
        @endif

        <form method="POST" action="{{ route('login') }}">
            @csrf

            <div>
                <x-label for="email" value="{{ __('Email') }}" />
                <x-input id="email" class="block mt-1 w-full" type="email" name="email" :value="old('email')" required autofocus autocomplete="username" />
            </div>

            <div class="mt-4">
                <x-label for="password" value="{{ __('Password') }}" />
                <x-input id="password" class="block mt-1 w-full" type="password" name="password" required autocomplete="current-password" />
            </div>

            <div class="block mt-4">
                <label for="remember_me" class="flex items-center">
                    <x-checkbox id="remember_me" name="remember" />
                    <span class="ml-2 text-sm text-gray-600">{{ __('Remember me') }}</span>
                </label>
            </div>

            {{-- Begin custom changes in login.blade.php --}}
            <div class="flex mt-4 justify-between">
                <a href="{{ route('auth.github') }}" class="inline-flex items-center px-2 float-left py-2 bg-gray-100 hover:bg-gray-200 border border-gray-300 tracking-widest focus:outline-none focus:ring-2 focus:ring-indigo-500 focus:ring-offset-2 ease-in-out h-10 mt-2 font-semibold text-xs transition-colors duration-150 rounded-lg uppercase focus:shadow-outline0 hover:bg-gray-100 focus:bg-gray-100 active:bg-gray-100 text-black">
                    <img src="https://www.cdnlogo.com/logos/g/55/github.svg" class="w-6 p-1 text-white">
                    Login with GitHub
                </a>
                <x-button class="h-10 px-2 py-2 m-2 ml-6 font-semibold text-xs text-white float-right transition-colors duration-150 rounded-lg uppercase focus:shadow-outline0 bg-gray-800 hover:bg-gray-700 focus:bg-gray-700 active:bg-gray-900">
                    {{ __('Log in') }}
                </x-button>
            </div>

            <div class="block mt-4 text-right">
                @if (Route::has('password.request'))
                    <a class="underline text-sm text-gray-600 hover:text-gray-900 rounded-md focus:outline-none focus:ring-2 focus:ring-offset-2 focus:ring-indigo-500" href="{{ route('password.request') }}">
                        {{ __('Forgot your password?') }}
                    </a>
                @endif
            </div>
            {{-- End custom changes in login.blade.php --}}
        </form>
    </x-authentication-card>
</x-guest-layout>
Step 11: Starting the Application
Run the following command to launch the application:
php artisan serveStep 12: Testing Logging in With GitHub
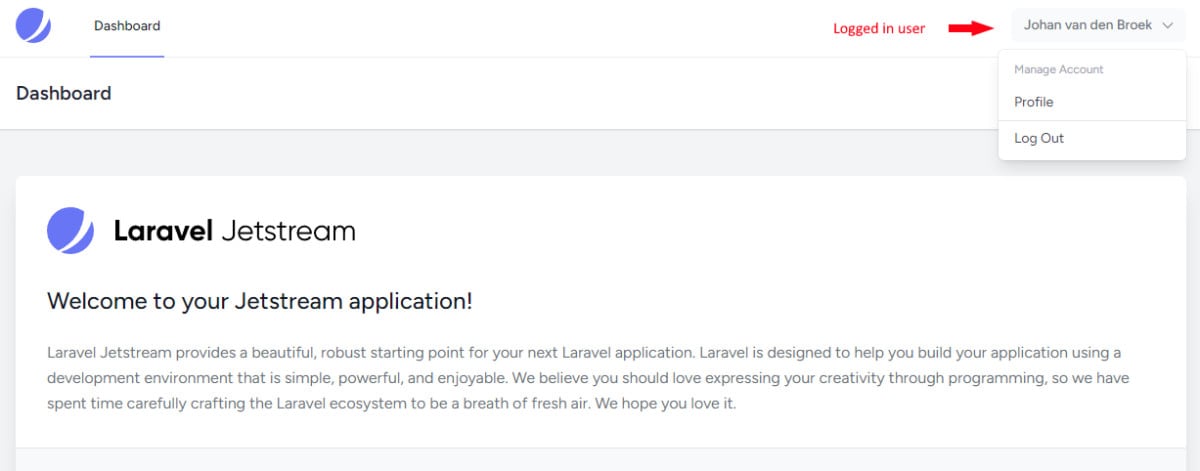
Go to http://127.0.0.1:8000/dashboard and you will be forwarded to the login form.
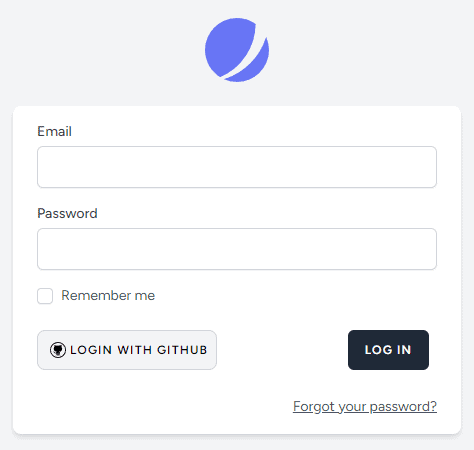
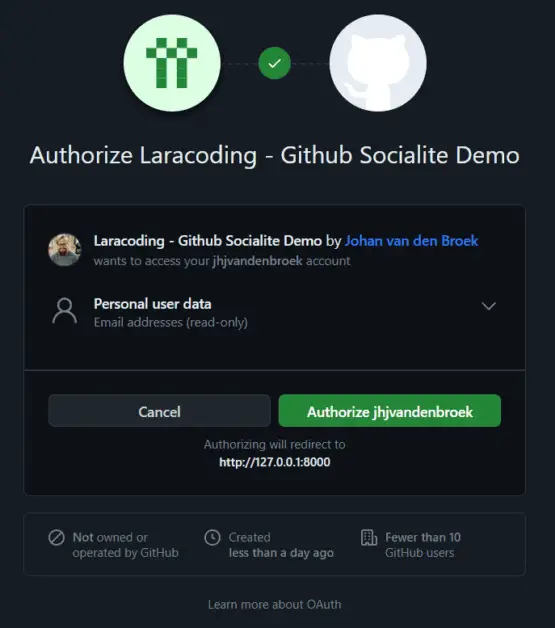
Click on the link “Log in with GitHub”. You will be asked to authorize the login with your GitHub account. It should look like this:
Conclusion
Congratulations! You’ve just integrated GitHub authentication into your Laravel application. This way your users will have a convenient alternative to access your application without creating a new password specifically for your app.
Now, it’s time to put your newfound knowledge into action. Implement a GitHub login in your Laravel app and check out the enhanced user experience it brings.
Should you need assistance or have questions along the way, don’t hesitate to refer to the resources mentioned in this guide or leave a comment below. Now, go ahead and implement GitHub authentication in your Laravel app to level up the user experience. Happy coding!
References
- Laravel Jetstream (Laravel Documentation)
- Laravel Socialite (Laravel Documentation)
- Registering a GitHub App (GitHub Documentation)
- GitHub Developer Settings (Admin For Creating GitHub Apps)
This entry is part 4 of 4 in the series Authenticating With Laravel Socialite
- Adding Login With Google to Your Laravel App Using Socialite
- Login to Your Laravel App With Facebook Using Socialite
- Login to Your Laravel App With Twitter / X Using Socialite
- Login to Your Laravel App With GitHub Using Socialite