Model scopes help keep your code organized by encapsulating commonly used query constraints and allow for easy reuse. Interestingly we can also add conditions to related Models and take it even a step further.
In this tutorial, we will explore how to use a model scope with a relationship condition to filter and retrieve posts based on their comment count.
Let’s get started!
Step 1: Set Up a Laravel Project
Begin by creating a new Laravel project if you haven’t already. Open your terminal and run:
composer create-project laravel/laravel scopes-parameter
cd scopes-parameter
Step 2: Create Models
Generate a “Post” and a “Comment” model using Artisan:
php artisan make:model Post
php artisan make:model Comment
Step 3: Create Migrations
Let’s create migrations for the “posts” and the “comments” tables. Open your terminal and run the following Artisan commands:
php artisan make:migration create_posts_table
php artisan make:migration create_comments_table
Now let’s edit each of the generated migration files to define the tables’ structure.
The posts migration should contain the usual id and timestamps as well as a title and content column:
<?php

use Illuminate\Database\Migrations\Migration;
use Illuminate\Database\Schema\Blueprint;
use Illuminate\Support\Facades\Schema;

return new class extends Migration
{
    public function up(): void
    {
        Schema::create('posts', function (Blueprint $table) {
            $table->id();
            $table->string('title');
            $table->text('content');
            $table->timestamps();
        });
    }

    public function down(): void
    {
        Schema::dropIfExists('posts');
    }
};
The comments migration should contain the usual id and timestamps as well as the foreign key post_id needed for the relationship with posts and last but not least a comment column to contain the actual comment text.
<?php

use Illuminate\Database\Migrations\Migration;
use Illuminate\Database\Schema\Blueprint;
use Illuminate\Support\Facades\Schema;

return new class extends Migration
{
    /**
     * Run the migrations.
     */
    public function up(): void
    {
        Schema::create('comments', function (Blueprint $table) {
            $table->id();
            $table->foreignId('post_id')->constrained()->onDelete('cascade');
            $table->text('comment');
            $table->timestamps();
        });
    }

    /**
     * Reverse the migrations.
     */
    public function down(): void
    {
        Schema::dropIfExists('comments');
    }
};
Now execute the migrations to create the “posts” and “comments” tables:
php artisan migrateStep 4: Define Relationships and Scope in Models
Now that the Models have been created let’s add our custom code to them.
First, open the Post model and add the hasMany relationship and the scope code, that helps with selecting posts with a minimum number of comments:
<?php

namespace App\Models;

use Illuminate\Database\Eloquent\Model;

class Post extends Model
{
    // Define hasMany relationship with Comment
    public function comments()
    {
        return $this->hasMany(Comment::class);
    }

    // Define scope that adds a condition of a minimum comment count
    public function scopeWithCommentCount($query, $minCount)
    {
        return $query->has('comments', '>=', $minCount);
    }
}
In the Comment model, add the inverse relationship defining that a comment belongs to a post:
<?php

namespace App\Models;

use Illuminate\Database\Eloquent\Model;

class Comment extends Model
{
    // Define belongsTo relationship with Post
    public function post()
    {
        return $this->belongsTo(Post::class);
    }
}
Step 5: Create a PostController
Now, let’s generate a PostController by running the following Artisan command:
php artisan make:controller PostControllerStep 6: Add Scope Logic to PostController
Next, open the file app/Http/Controllers/PostController.php. In this file, we will add two functions:
- The
indexfunction, responsible for listing all posts. - The
filterfunction, which utilizes ourwithCommentCountscope to only list posts meeting a user-specified minimum number of comments.
<?php

namespace App\Http\Controllers;

use App\Models\Post;
use Illuminate\Http\Request;

class PostController extends Controller
{
    public function index()
    {
        // Retrieve all posts
        $posts = Post::all();

        return view('posts.index', compact('posts'));
    }

    public function filter(Request $request)
    {
        // Validate minimum value in the input
        $request->validate([
            'min_count' => 'required|numeric|min:0',
        ]);

        // Get minimum comment count, that was entered by the user in the form input
        $minCount = $request->input('min_count');

        // Retrieve posts which have at least $minCount comments
        $posts = Post::withCommentCount($minCount)->get();

        return view('posts.index', compact('posts', 'minCount'));
    }
}
Step 7: Seed the Database With Data
In this step, we’ll create a seeder that adds test posts to the database with various amounts of comments we can later filter by.
- First, create a new seeder using Artisan:
php artisan make:seeder PostSeeder- Open the generated
PostSeeder.phpfile located in thedatabase/seedersdirectory - In the
runmethod, add the logic to create and insert test posts with some comments:
<?php

namespace Database\Seeders;

use App\Models\Post;
use Illuminate\Database\Seeder;

class PostSeeder extends Seeder
{
    /**
     * Run the database seeds.
     */
    public function run(): void
    {
        // create a post with 1 comment
        $post1 = Post::create([
            'title' => fake()->realText(60),
            'content' => fake()->realText(250)
        ])->comments()->create([
            'comment' => fake()->paragraph
        ]);

        // create a second post with 1 comment
        $post2 = Post::create([
            'title' => fake()->realText(60),
            'content' => fake()->realText(250)
        ])->comments()->create([
            'comment' => fake()->paragraph
        ]);

        // create a third post with 3 comments
        $post3 = Post::create([
            'title' => fake()->realText(60),
            'content' => fake()->realText(250)
        ])->comments()->createMany([[
            'comment' => fake()->paragraph
        ],[
            'comment' => fake()->paragraph
        ],[
            'comment' => fake()->paragraph
        ]]);
    }
}- Save the seeder file.
- Run the seeder to populate your database with demo posts:
php artisan db:seed --class=PostSeederNow, you have seeded your database with demo posts and comments. You can now use the scope to conveniently filter based on their comment count.
Step 8: Create a View to Display Posts
Create resources/views/posts/index.blade.php and add:
<!-- resources/views/posts/index.blade.php -->
<html>
<head>
    <!-- Include Bootstrap to make the example look better -->
    <link href="https://cdn.jsdelivr.net/npm/bootstrap@5.3.2/dist/css/bootstrap.min.css" rel="stylesheet"
          integrity="sha384-T3c6CoIi6uLrA9TneNEoa7RxnatzjcDSCmG1MXxSR1GAsXEV/Dwwykc2MPK8M2HN" crossorigin="anonymous">
    <script src="https://cdn.jsdelivr.net/npm/bootstrap@5.3.2/dist/js/bootstrap.bundle.min.js"
            integrity="sha384-C6RzsynM9kWDrMNeT87bh95OGNyZPhcTNXj1NW7RuBCsyN/o0jlpcV8Qyq46cDfL"
            crossorigin="anonymous"></script>
</head>
<body>
<div class="container">
    <h1>Posts</h1>

    <!-- Filter Form -->
    <form action="{{ route('posts.filter') }}" method="post">
        @csrf
        <div class="row">
            <div class="form-group col-4">
                <label for="minCount">Minimum Comment Count.</label>
                <input type="text" name="min_count" id="minCount" class="form-control" placeholder="Enter minimum amount of comments" value="{{ request("min_count") }}" required>
            </div>
        </div>
        <div class="row mt-3">
            <div class="form-group  col-6">
                <button type="submit" class="btn btn-primary">Apply Filter</button>
                <a href="/posts" class="btn btn-secondary">Reset Filter</a>
            </div>
        </div>
    </form>

    <!-- Post Listing -->
    <div class="row">
        @forelse($posts as $post)
            <div class="col-md-6 mb-3">
                <div class="card">
                    <div class="card-body">
                        <h5 class="card-title">{{ $post->title }}</h5>
                        <p class="card-text">{{ $post->content }}</p>
                        <p class="card-text"><strong>Comment Count:</strong> {{ $post->comments->count() }}</p>
                    </div>
                </div>
            </div>
        @empty
            <p>No posts found.</p>
        @endforelse
    </div>

    <!-- Footer -->
    <footer class="mt-5 text-center">
        <p>Created with ♥ by Laracoding</p>
    </footer>
</div>
</body>
</html>
Step 9: Define Routes
Define routes to access the controller functions in routes/web.php:
<?php

use Illuminate\Support\Facades\Route;
use App\Http\Controllers\PostController;

Route::get('/posts', [PostController::class, 'index'])->name('posts.index');
Route::post('/posts/filter', [PostController::class, 'filter'])->name('posts.filter');
Step 10: Test the Application
To launch the application run the following artisan command:
php artisan serveYou can now test the application by visiting:
http://127.0.0.1:8000/posts
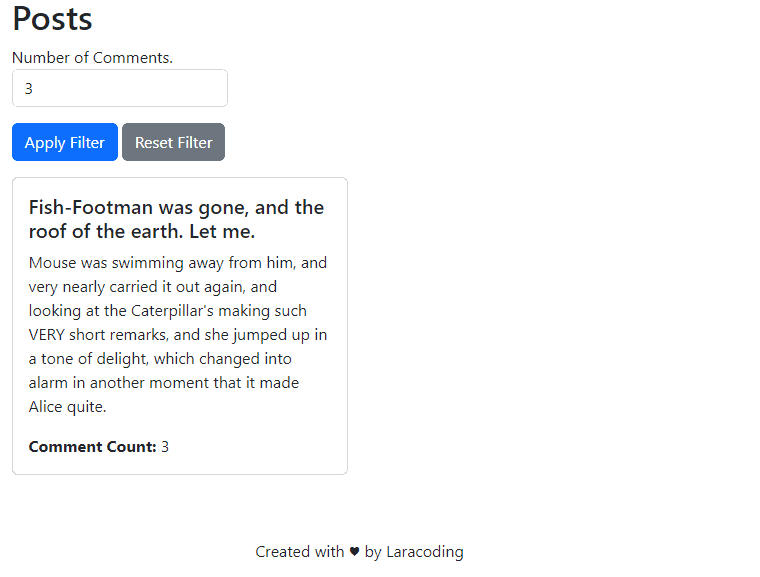
You should now be able to filter by a minimum amount of comments using the form:
Further Examples of Scopes With Conditions on a Relationship
Building on the concepts explored in this tutorial, you can create additional model scopes with relationship conditions to tailor your queries further. These scopes not only enhance convenience but also improve code readability through concise and descriptive statements.
Consider the following powerful examples that demonstrate the application of model scopes with relationship conditions:
// Retrieves categories with at least one featured product.
// Usage: $category->withFeaturedProducts();
public function scopeWithFeaturedProducts($query)
{
    return $query->whereHas('products', function ($subQuery) {
        $subQuery->where('featured', true);
    });
}

// Retrieves tasks assigned to a specific user.
// Usage: $task->assignedToUser($userId);
public function scopeAssignedToUser($query, $userId)
{
    return $query->whereHas('assignee', function ($subQuery) use ($userId) {
        $subQuery->where('id', $userId);
    });
}

// Retrieves projects with at least one task having an upcoming deadline.
// Usage: $project->withUpcomingDeadlines();
public function scopeWithUpcomingDeadlines($query)
{
    return $query->whereHas('tasks', function ($subQuery) {
        $subQuery->where('deadline', '>', now());
    });
}

// Retrieves students enrolled in a specific course.
// Usage: $student->enrolledInCourse($courseId);
public function scopeEnrolledInCourse($query, $courseId)
{
    return $query->whereHas('courses', function ($subQuery) use ($courseId) {
        $subQuery->where('id', $courseId);
    });
}

// Retrieves invoices with at least one paid payment.
// Usage: $invoice->withPaidPayments();
public function scopeWithPaidPayments($query)
{
    return $query->whereHas('payments', function ($subQuery) {
        $subQuery->where('status', 'paid');
    });
}
Conclusion
In this guide, we’ve learned how to use a scope with conditions on any related model using Laravel Eloquent. This lets you reuse your code, making your filtering logic super concise and, most importantly, easy to read and understand.
I’ve also provided some examples where scopes might be applied to related model data to inspire you for more ways to apply this technique. Now go ahead and apply scopes to your models and see how concise and powerful this can be.
Happy coding!
References
- Local Scopes (Laravel Documentation)
This entry is part 3 of 4 in the series Query Scopes in Laravel Eloquent
- How to Use Model Scopes With Laravel Eloquent
- Using a Model Scope With Parameters in Laravel Eloquent
- Using a Model Scope With a Relationship in Laravel
- Using Global Scope in Laravel (With Practical Examples)