Eager loading is a technique used to retrieve related models along with the primary model in a single query. This reduces the number of database queries and improves performance.
The syntax to eager load in Laravel is very concise, for example:
// Load all posts and all their related comments
$posts = Post::with('comments')->get();
When you’re certain that you’ll need to access comments for all retrieved $posts, using with() is the ideal approach. However, if you intend to display a list of posts without their comments, it’s advisable to avoid using ->with() and simply use Post::all() instead. This avoids an extra database query that accesses the comments table.
To illustrate how to use eager loading, this tutorial walks you through building an example application that uses with() to retrieve posts and all their related comments and renders them in a view.
Additionally, we’ll address frequently asked questions, including the differences between ->load() and ->with(), combining eager loading with other query techniques, and applying it to nested relationships.
Let’s get started!
Step 1: Set Up Laravel Environment
First, ensure you have Laravel installed. If not, install it using Composer:
composer create-project --prefer-dist laravel/laravel blogNavigate into your project directory:
cd blogStep 2: Create Model and Migration
Generate a model and migration for the Post model:
php artisan make:model Post -m
php artisan make:model Comment -m
This command will create a posts table migration and a corresponding Post model.
Step 3: Add Migration Code
Open each of the generated migration files for the table comments and posts to define their necessary fields.
For posts, use:
<?php

use Illuminate\Database\Migrations\Migration;
use Illuminate\Database\Schema\Blueprint;
use Illuminate\Support\Facades\Schema;

return new class extends Migration
{
    public function up(): void
    {
        Schema::create('posts', function (Blueprint $table) {
            $table->id();
            $table->string('title');
            $table->text('content');
            $table->timestamps();
        });
    }

    public function down(): void
    {
        Schema::dropIfExists('posts');
    }
};
For comments, use:
<?php

use Illuminate\Database\Migrations\Migration;
use Illuminate\Database\Schema\Blueprint;
use Illuminate\Support\Facades\Schema;

return new class extends Migration
{
    public function up(): void
    {
        Schema::create('comments', function (Blueprint $table) {
            $table->id();
            $table->unsignedBigInteger('post_id');
            $table->text('content');
            $table->timestamps();

            $table->foreign('post_id')
                ->references('id')
                ->on('posts')
                ->onDelete('cascade');
        });
    }

    public function down(): void
    {
        Schema::dropIfExists('comments');
    }
};
Step 4: Run Migrations
Now, run the migrations to create the database tables:
php artisan migrateStep 5: Add Model Relations
Now let’s add the code for the Post and Comment models to define the relationships between them. We should also add $fillable and set it so that title and content can be easily filled when using eloquent ->create() later on:
For Post use:
<?php

namespace App\Models;

use Illuminate\Database\Eloquent\Model;

class Post extends Model
{
    protected $fillable = ['title', 'content'];

    public function comments()
    {
        return $this->hasMany(Comment::class);
    }
}
For Comment use:
<?php

namespace App\Models;

use Illuminate\Database\Eloquent\Model;

class Comment extends Model
{
    protected $fillable = ['content'];

    public function post()
    {
        return $this->belongsTo(Post::class);
    }
}
Step 6: Create Controller
To create a controller named PostController, you can use the following artisan command:
php artisan make:controller PostControllerStep 7: Add Controller Code
In the PostController.php we can now use the with() method to eager load comments when retrieving posts:
<?php

namespace App\Http\Controllers;

use App\Models\Post;
use Illuminate\View\View;

class PostController extends Controller
{
    public function index(): View
    {
        $posts = Post::with('comments')->get();
        return view('posts.index', compact('posts'));
    }
}
Step 8: Display Data in View
Now create a view to display posts and their comments in resources/views/posts/index.blade.php and use the following code:
<!DOCTYPE html>
<html lang="en">
<head>
    <meta charset="UTF-8">
    <meta name="viewport" content="width=device-width, initial-scale=1.0">
    <title>Blog</title>
    <!-- Bootstrap CSS -->
    <link href="https://cdn.jsdelivr.net/npm/bootstrap@5.3.0/dist/css/bootstrap.min.css" rel="stylesheet">
</head>
<body>

<div class="container mt-5">
    @foreach ($posts as $post)
        <div class="card mb-3">
            <div class="card-body">
                <h2 class="card-title">{{ $post->title }}</h2>
                <p class="card-text">
                    <small>
                        Posted {{ $post->created_at->toFormattedDateString() }}
                    </small>
                </p>
                <p class="card-text">
                    {{ $post->content }}
                </p>
                <h3 class="card-title">Comments:</h3>
                <ul class="list-group list-group-flush">
                    @foreach ($post->comments as $comment)
                        <li class="list-group-item">{{ $comment->content }} <small class="text-muted">({{ $comment->created_at->diffForHumans() }})</small></li>
                    @endforeach
                </ul>
            </div>
        </div>
    @endforeach
</div>

</body>
</html>
This will take the data passed in $posts and loop them to display them and loop their comments to display them too.
Step 9: Add Routes
Now let’s define routes necessary to access the controller methods by opening routes/web.php and adding:
<?php

use App\Http\Controllers\PostController;
use Illuminate\Support\Facades\Route;

Route::get('/posts', [PostController::class, 'index'])->name('posts.index');
Step 10: Add Some Testdata
Now let’s generate some testdata so that we can test if the result in our browser correctly shows the posts and related comments.
The most straightforward way to do this is to open tinker by running:
php artisan tinkerAnd copy & pasting the following code:
use App\Models\Post;
use App\Models\Comment;

$post1 = Post::create(['title' => 'First Post', 'content' => 'Content of the first post']);
$post2 = Post::create(['title' => 'Second Post', 'content' => 'Content of the second post']);
$post3 = Post::create(['title' => 'Third Post', 'content' => 'Content of the third post']);

// Create comments for post1
$comment1 = new Comment(['content' => 'Comment on the first post']);
$post1->comments()->save($comment1);

$comment2 = new Comment(['content' => 'Another comment on the first post']);
$post1->comments()->save($comment2);

// Create comments for post2
$comment3 = new Comment(['content' => 'Comment on the second post']);
$post2->comments()->save($comment3);

// Create comments for post3
$comment4 = new Comment(['content' => 'Comment on the third post']);
$post3->comments()->save($comment4);
This should create 3 posts in your local database and add a few comments to them.
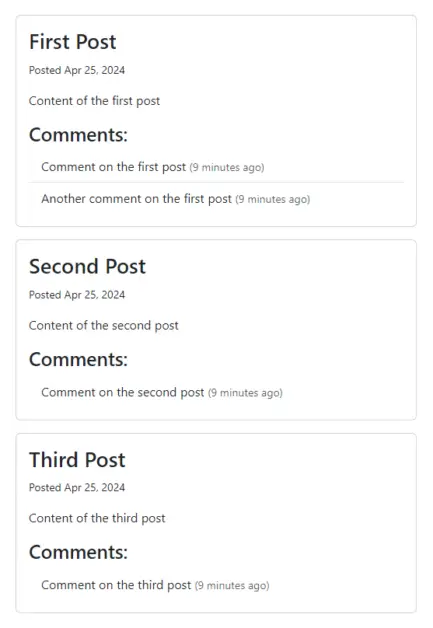
Step 11: Testing the Application
You can start the application by running the following artisan command:
php artisan serveAfterwards you can open your browser and navigate to http://127.0.0.1:8000/posts
The result should look like this:
Frequently Asked Questions
When to Use ->with() and When to Use ->load() for Retrieving Related Records Using Eloquent
In Eloquent, both ->load() and ->with() methods are used to retrieve a models related models. While with() retrieves all related records immediately, ->load will lazy load the related records just for one instance at a time.
Let’s examine each of them along with an example.
->with()is typically used when you want to eager load related models at the time of fetching the initial model. It allows you to specify which relationships you want to load upfront in the initial query.
// Retrieves a `Post` is along with all related `Comment` records
$posts = Post::with('comments')->get();
In this example, Laravel will fetch all posts along with their associated comments in a single query. Behind the scenes it always runs 2 queries, which looks like this:
-- Raw SQL Queries
SELECT * FROM "posts"
SELECT * FROM "comments" WHERE "comments"."post_id" IN (1, 2, 3)->load()is used when you already retrieved one or more records of a model and you want to lazy load related records later on in your code:
// First retrieve `Post` records
$posts = Post::all();

// Later iterate through $posts and for each `Post` retrieve `Comment` records
foreach ($posts as $post) {
    $post->load('comments');
}
This will fetch the comments related to the specific post with ID 1. It’s useful when you want to defer the loading of related models until they are actually needed in your application flow. Behind the scenes it runs one query plus one extra query for each related record that is loaded, which looks like this:
SELECT * FROM "posts"
SELECT * FROM "comments" WHERE "comments"."post_id" IN (1)
SELECT * FROM "comments" WHERE "comments"."post_id" IN (2)
SELECT * FROM "comments" WHERE "comments"."post_id" IN (3)
Can Eager Loading be Combined With Other Querying Techniques?
In Laravel you can combine eager loading with other querying techniques. For example, you can combine eager loading with additional filtering, sorting, and pagination methods like where, orderBy, and paginate.
A few examples of how this could look like are:
// Eager load posts along with their comments and filter by a specific condition
$posts = Post::with('comments')->where('status', 'published')->get();

// Eager load posts along with their comments and sort them by the post's creation date
$posts = Post::with('comments')->orderBy('created_at', 'desc')->get();

// Eager load posts along with their comments and paginate the results
$posts = Post::with('comments')->paginate(10);
How Does Eager Loading Handle Nested Relationships?
In Laravel, eager loading can handle nested relationships by specifying multiple relationships to load in a hierarchical manner. You can chain the relationships using dot notation.
For example, suppose you have three models: Post, Comment, and User, where a post has many comments, and each comment belongs to a user. To eager load both comments and users for each post, you would write:
$posts = Post::with('comments.user')->get();Conclusion
In this tutorial, we’ve learned how to use Laravel’s with() method to eager load Model data along with its relationships and how this can lead to fewer query’s to the database and thus optimize your application.
The example used eager loading of posts along with their comments to reduce the number of database queries to 2, one to get posts and one to get comments. Without eager loading we’d need a query for the posts table and a query for each of the post to get its comments. This is referred to as N+1 Problem.
When developing Laravel applications that work with SQL databases, I recommend looking at the raw queries that are generated to ensure you are retrieving your data efficiently. To learn how to view the SQL generated by Laravel I recommend reading my tutorial: How to Get Raw SQL Query From Laravel Query Builder or Model.
Now go ahead try out eager loading and see if you can use it to speed up your own projects. Happy coding!
References
- Eloquent: Relationships – Eager Loading (Laravel Documentation)
This entry is part 9 of 9 in the series Laravel Eloquent Relationships
- How to Use a One-to-One Relationship in Laravel
- How to Use a One-to-Many Relationship in Laravel
- How to Use a Many-to-Many Relationship in Laravel
- Using Extra Fields in Pivot Table With Laravel belongsToMany
- How to Use Has-Many-Through Relationships in Laravel
- How to use One-to-Many Polymorphic Relationship in Laravel
- How to use Many-to-Many Polymorphic Relationship in Laravel
- How to Paginate a Model with Relationship in Laravel
- How to Use `with()` to Eager Load Relationship in Laravel
