Many-to-Many relationships are commonly used in applications to link 2 or more entities through a pivot table. In this blog post, I’ll demonstrate how a Many-to-Many relationship is set up and accessed using Laravel Eloquent.
To use a Many-to-Many relationship in Laravel we need to define a belongsToMany method in each of the Models involved, along with a pivot table to connect the two tables that follow Laravel’s naming convention. For example, the pivot of the tables students and courses should be named course_student.
While I wouldn’t recommend it, it is possible to use a naming that is different from the Laravel naming convention. We’ll show this in step 2

students and courses and their pivot course_studentIn the following step-by-step guide, we’ll see exactly how this can be implemented and how we can create data that is related by a Many-to-Many and access it.
Let’s get started!
Step 1: Creating and Running the Migrations
To begin, let’s create the necessary migrations for the “students” and “courses” tables, as well as the pivot table “course_student”. Open your terminal and run the following Artisan commands:
php artisan make:migration create_students_table --create=students
php artisan make:migration create_courses_table --create=courses
php artisan make:migration create_course_student_table --create=course_student
This will generate three migration files: one for the “students” table, one for the “courses” table, and one for the pivot table “course_student”. Open each of the generated migration files and modify their up() and down() methods as shown below:
For the students table, use:
<?php

use Illuminate\Database\Migrations\Migration;
use Illuminate\Database\Schema\Blueprint;
use Illuminate\Support\Facades\Schema;

return new class extends Migration
{
    /**
     * Run the migrations.
     */
    public function up(): void
    {
        Schema::create('students', function (Blueprint $table) {
            $table->id();
            $table->string('name');
            $table->timestamps();
        });
    }

    /**
     * Reverse the migrations.
     */
    public function down(): void
    {
        Schema::dropIfExists('students');
    }
};
For the courses table, use:
<?php

use Illuminate\Database\Migrations\Migration;
use Illuminate\Database\Schema\Blueprint;
use Illuminate\Support\Facades\Schema;

return new class extends Migration
{
    /**
     * Run the migrations.
     */
    public function up(): void
    {
        Schema::create('courses', function (Blueprint $table) {
            $table->id();
            $table->string('title');
            $table->string('description')->nullable();
            $table->timestamps();
        });
    }

    /**
     * Reverse the migrations.
     */
    public function down(): void
    {
        Schema::dropIfExists('courses');
    }
};
For the course_student pivot table, use:
<?php

use Illuminate\Database\Migrations\Migration;
use Illuminate\Database\Schema\Blueprint;
use Illuminate\Support\Facades\Schema;

return new class extends Migration
{
    /**
     * Run the migrations.
     */
    public function up(): void
    {
        Schema::create('course_student', function (Blueprint $table) {
            $table->id();
            $table->foreignIdFor(\App\Models\Student::class);
            $table->foreignIdFor(\App\Models\Course::class);
        });
    }

    /**
     * Reverse the migrations.
     */
    public function down(): void
    {
        Schema::dropIfExists('course_student');
    }
};
Please note that the
course_studenttable contains only the essential fields to establish the relation (2 foreign key values). However, it is possible to include additional fields which can be useful. For instance, you could add an enrollment_date column to store the date when a student enrolls for the course. To learn more about adding and accessing extra fields in a pivot table with Laravel’s belongsToMany relationship, you can read my post: Using Extra Fields in Pivot Table With Laravel belongsToMany.
After saving the modified migration files, run the following command to create the tables:
php artisan migrateStep 2: Creating the Eloquent Models
Next, let’s create the Eloquent models for the “Student” and “Course” entities. Run the following commands in your terminal:
php artisan make:model Student
php artisan make:model Course
This will generate two model files in the “app/Models” directory.
Note: In this case, we do not need to create a model for the intermediate pivot table “course_student” since it does not require additional functionality beyond the relationship.
Open the generated model files and add the necessary relationships as shown below.
For the Student Model, use:
<?php

namespace App\Models;

use Illuminate\Database\Eloquent\Model;

class Student extends Model
{

    public function courses()
    {
        return $this->belongsToMany(Course::class);
    }
}
For the Course Model, use:
<?php

namespace App\Models;

use Illuminate\Database\Eloquent\Model;

class Course extends Model
{
    public function students()
    {
        return $this->belongsToMany(Student::class);
    }
}
It’s worth noting that you can customize the pivot table name if necessary. By providing a second parameter to the
belongsToManymethod, you can specify a different name for the pivot table. For example, you can usereturn $this->belongsToMany(Student::class, 'courses_students');to define a custom pivot table named “courses_students”. This flexibility allows you to choose a pivot table name that aligns with your specific needs.
Step 3: Performing Many-to-Many Queries
Now that we have set up the migrations and models, we can perform queries to retrieve and manipulate data using the many-to-many relationship. Here are a few examples of how you can use the relationship:
<?php

use Illuminate\Support\Facades\Route;

Route::get('/many-to-many', function () {
    // Create a new student
    $student = new \App\Models\Student();
    $student->name = 'John Doe';
    $student->save();

    // Create a new course
    $course = new \App\Models\Course();
    $course->title = 'Introduction to Laravel';
    $course->description = 'Introduction to Laravel';
    $course->save();

    // Associate a student with a course
    $student->courses()->attach($course);

    // Retrieve courses for a student
    $student = \App\Models\Student::find(1);
    $courses = $student->courses;
    dump($courses);

    // Retrieve students for a course
    $course = \App\Models\Course::find(1);
    $students = $course->students;
    dump($students);
});
In a Many-to-Many relationship in Laravel Eloquent, you can associate a model with a related model by calling the attach() method. For example, $student->courses()->attach($course) establishes a connection between the $student model and the $course model, creating a record in the pivot table.
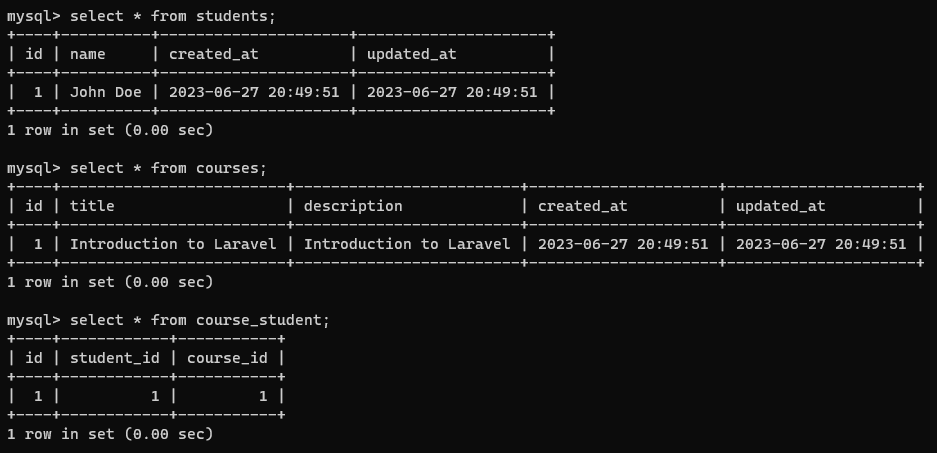
After running our queries the database contains the following records:
Further Many-to-Many Examples
In addition to the “Student”, and “Course” entities and their pivot table, we have used in this tutorial, there are various other scenarios where the Many-to-Many relationship can be applied. Here are a few more examples:
| Example | Model 1 | Pivot Table | Model 2 |
| 1 | User | user_role | Role |
| 2 | Product | category_product | Category |
| 3 | Student | course_student | Course |
| 4 | Actor | movie_actor | Movie |
| 5 | Author | book_author | Book |
| 6 | Team | player_team | Player |
| 7 | Recipe | ingredient_recipe | Ingredient |
By understanding the concept of Many-to-Many relationships in Laravel, you can effectively manage you can easily manage complex relationships and retrieve data from related models.
Conclusion
In this tutorial, we have learned how to set-up a Many-to-Many relationship by creating the necessary migrations for the tables students, courses and their pivot table course_student, and the Eloquent models for the Student and Course entities.
We have also seen how to perform Many-to-Many queries, such as associating a student with a course using the attach() method and retrieving related data.
By following these steps, you can effectively establish and manage Many-to-Many relationships in your Laravel applications.
Finally, we included some example entities to which you might apply a Many-to-Many Relationship, as an inspiration. Happy coding!
References:
This entry is part 3 of 9 in the series Laravel Eloquent Relationships
- How to Use a One-to-One Relationship in Laravel
- How to Use a One-to-Many Relationship in Laravel
- How to Use a Many-to-Many Relationship in Laravel
- Using Extra Fields in Pivot Table With Laravel belongsToMany
- How to Use Has-Many-Through Relationships in Laravel
- How to use One-to-Many Polymorphic Relationship in Laravel
- How to use Many-to-Many Polymorphic Relationship in Laravel
- How to Paginate a Model with Relationship in Laravel
- How to Use `with()` to Eager Load Relationship in Laravel

Johan’s pages on Larvel consistently are beautifully clear, methodical, concise and get to the core of what one needs to know. Always find myself coming back to them. Keep up the good work!
Thanks so much for taking the time to leave me this wonderful compliment! It really means a lot to me. If you ever have any questions or suggestions, feel free to reach out.