Font Awesome is a popular icon library, that can add visual appeal and functionality to your Laravel website. It can be added in numerous ways but adding it using Vite has certain advantages.
Vite has been included as the default build tool ever since Laravel 8 was released. Using Vite to compile your CSS and JS helps optimize and minify your assets, including third party dependencies such as Font Awesome.
In this guide, I’ll walk you through the process of integrating Font Awesome into your Laravel project using Vite. Let’s get started!
Step 1: Create a New Laravel Project
If you haven’t already, start by creating a new Laravel project. Open your terminal and run the following commands:
composer create-project laravel/laravel my-laravel-app
cd my-laravel-app
Laravel 9 and newer ship with Vite by default. If you have a recent version skip to the next step.
If you are using Laravel 8 or an older version, install Vite by running this command:
npm install --save-dev viteStep 2: Install Font Awesome Using npm
Use npm install all the required font awesome files by running:
npm install --save @fortawesome/fontawesome-freeStep 3: Add Font Awesome imports to app.css
Edit or create resources/css/app.css and add the following code:
@import '@fortawesome/fontawesome-free/css/fontawesome.css';
@import '@fortawesome/fontawesome-free/css/regular.css';
@import '@fortawesome/fontawesome-free/css/solid.css';
@import '@fortawesome/fontawesome-free/css/brands.css';
Step 4: Configure Vite
Edit or create vite.config.js file in the root directory of your Laravel project and configure Vite to bundle Font Awesome along with your assets:
import { defineConfig } from 'vite';
import laravel from 'laravel-vite-plugin';

export default defineConfig({
    plugins: [
        laravel({
            input: ['resources/css/app.css', 'resources/js/app.js'],
            refresh: true,
        }),
    ],
});
Step 5: Include Font Awesome in Your Blade Templates
In your Blade templates where you want to use Font Awesome icons, include the necessary CSS and JS files using the Blade directive @vite. For example, in your resources/views/welcome.blade.php:
<!DOCTYPE html>
<html>
<head>
    <!-- ... -->
    @vite(['resources/css/app.css', 'resources/js/app.js'])
</head>
<body>
    <!-- ... -->
    <i class="fas fa-coffee"></i> <!-- Replace with your desired icon class -->
</body>
</html>
Step 6: Add a Route
Edit routes/web.php and to sure it contains a route to the welcome page:
<?php

use App\Models\User;
use Illuminate\Support\Facades\DB;
use Illuminate\Support\Facades\Route;

/*
|--------------------------------------------------------------------------
| Web Routes
|--------------------------------------------------------------------------
|
| Here is where you can register web routes for your application. These
| routes are loaded by the RouteServiceProvider and all of them will
| be assigned to the "web" middleware group. Make something great!
|
*/

Route::get('/', function () {
    return view('welcome');
});
Step 7: Compile Your Assets Using npm
Now, you’re ready to compile your assets using Vite. Run the following command:
npm run devThe primary benefit of using npm run dev is that Vite automatically detects changes in your .js and .css files, rebuilds your assets into the ‘public’ folder, and refreshes them in the browser using Hot Module Replacement (HMR), eliminating the need for manual refreshing.
For production use run build instead:
npm run buildThe main reason for using npm run build instead of npm run dev is that Vite will minify and optimize your assets automatically, helping to reduce file sizes.
Your Laravel application is now ready with Font Awesome integrated!
Step 8: Test the Application
In order to test our local application run the following command:
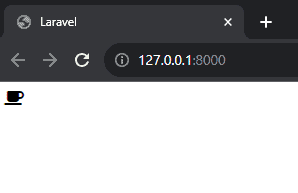
php artisan serveOpen your site in the browser by navigating to http://localhost:8000 and verify that the coffee icon is displayed, as shown below.
That’s it! You can now use any icons included in the free version of Font Awesome.
For a full list of supported icons and their codes, check out: https://fontawesome.com/search?m=free
Frequently Asked Questions
How Can I Update My Font Awesome Version Using Vite?
One advantage of using Vite for asset management is its ease of updating dependencies. Now, when the Font Awesome vendor releases a new version, you can update and recompile your assets by running these simple commands:
npm update @fortawesome/fontawesome-free
npm run build
That’s it! You can now use any new icons added in a new release!
How Can I Install Font Awesome by Using SASS/SCSS in Laravel+Vite?
Should you prefer SASS over CSS follow the steps outlined below.
- First install SASS by running:
npm install -D sass- Then edit
resources/app.jsand copy+paste the following code:
import './bootstrap';

import '@fortawesome/fontawesome-free/scss/fontawesome.scss';
import '@fortawesome/fontawesome-free/scss/brands.scss';
import '@fortawesome/fontawesome-free/scss/regular.scss';
import '@fortawesome/fontawesome-free/scss/solid.scss';
import '@fortawesome/fontawesome-free/scss/v4-shims.scss';- If present, remove remaining Font Awesome imports from
resources/css/app.css - Finally, recompile your assets using:
npm run devConclusion
In summary, adding Font Awesome icons to your Laravel project is a quick-win action that enhances your site visually and makes it look more professional.
Using Vite to pull the required files allows for an easy installation, updates, optimization and minification of your assets throughout your application’s lifecycle.
Now you can enjoy a more visually appealing Laravel site with the flexibility and speed that Vite provides. Happy coding!
References
This entry is part 1 of 5 in the series Installing Laravel Assets Using Vite
- How to Install Font Awesome in Laravel With Vite
- How to Install jQuery in Laravel With Vite
- How to Install Bootstrap in Laravel With Vite
- How to Install TinyMCE in Laravel With Vite
- How to Add Custom JavaScript to Laravel With Vite
